I dug out a computer running Fedora 28, which was released 2018-04-01 - over 5 years ago. Backing up the data and re-installing seemed tedious, but the current version of Fedora is 38, and while Fedora supports updates from N to N+2 that was still going to be 5 separate upgrades. That seemed tedious, so I figured I'd just try to do an update from 28 directly to 38. This is, obviously, extremely unsupported, but what could possibly go wrong?
Running sudo dnf system-upgrade download --releasever=38 didn't successfully resolve dependencies, but sudo dnf system-upgrade download --releasever=38 --allowerasing passed and dnf started downloading 6GB of packages. And then promptly failed, since I didn't have any of the relevant signing keys. So I downloaded the fedora-gpg-keys package from F38 by hand and tried to install it, and got a signature hdr data: BAD, no. of bytes(88084) out of range error. It turns out that rpm doesn't handle cases where the signature header is larger than a few K, and RPMs from modern versions of Fedora. The obvious fix would be to install a newer version of rpm, but that wouldn't be easy without upgrading the rest of the system as well - or, alternatively, downloading a bunch of build depends and building it. Given that I'm already doing all of this in the worst way possible, let's do something different.
The relevant code in the hdrblobRead function of rpm's lib/header.c is: int32_t il_max = HEADER_TAGS_MAX; int32_t dl_max = HEADER_DATA_MAX;
if (regionTag == RPMTAG_HEADERSIGNATURES) il_max = 32; dl_max = 8192;
which indicates that if the header in question is RPMTAG_HEADERSIGNATURES, it sets more restrictive limits on the size (no, I don't know why). So I installed rpm-libs-debuginfo, ran gdb against librpm.so.8, loaded the symbol file, and then did disassemble hdrblobRead. The relevant chunk ends up being: 0x000000000001bc81 <+81>: cmp $0x3e,%ebx 0x000000000001bc84 <+84>: mov $0xfffffff,%ecx 0x000000000001bc89 <+89>: mov $0x2000,%eax 0x000000000001bc8e <+94>: mov %r12,%rdi 0x000000000001bc91 <+97>: cmovne %ecx,%eax
which is basically "If ebx is not 0x3e, set eax to 0xffffffff - otherwise, set it to 0x2000". RPMTAG_HEADERSIGNATURES is 62, which is 0x3e, so I just opened librpm.so.8 in hexedit, went to byte 0x1bc81, and replaced 0x3e with 0xfe (an arbitrary invalid value). This has the effect of skipping the if (regionTag == RPMTAG_HEADERSIGNATURES) code and so using the default limits even if the header section in question is the signatures. And with that one byte modification, rpm from F28 would suddenly install the fedora-gpg-keys package from F38. Success!
But short-lived. dnf now believed packages had valid signatures, but sadly there were still issues. A bunch of packages in F38 had files that conflicted with packages in F28. These were largely Python 3 packages that conflicted with Python 2 packages from F28 - jumping this many releases meant that a bunch of explicit replaces and the like no longer existed. The easiest way to solve this was simply to uninstall python 2 before upgrading, and avoiding the entire transition. Another issue was that some data files had moved from libxcrypt-common to libxcrypt, and removing libxcrypt-common would remove libxcrypt and a bunch of important things that depended on it (like, for instance, systemd). So I built a fake empty package that provided libxcrypt-common and removed the actual package. Surely everything would work now?
Ha no. The final obstacle was that several packages depended on rpmlib(CaretInVersions), and building another fake package that provided that didn't work. I shouted into the void and Bill Nottingham answered - rpmlib dependencies are synthesised by rpm itself, indicating that it has the ability to handle extensions that specific packages are making use of. This made things harder, since the list is hard-coded in the binary. But since I'm already committing crimes against humanity with a hex editor, why not go further? Back to editing librpm.so.8 and finding the list of rpmlib() dependencies it provides. There were a bunch, but I couldn't really extend the list. What I could do is overwrite existing entries. I tried this a few times but (unsurprisingly) broke other things since packages depended on the feature I'd overwritten. Finally, I rewrote rpmlib(ExplicitPackageProvide) to rpmlib(CaretInVersions) (adding an extra '\0' at the end of it to deal with it being shorter than the original string) and apparently nothing I wanted to install depended on rpmlib(ExplicitPackageProvide) because dnf finished its transaction checks and prompted me to reboot to perform the update. So, I did.
And about an hour later, it rebooted and gave me a whole bunch of errors due to the fact that dbus never got started. A bit of digging revealed that I had no /etc/systemd/system/dbus.service, a symlink that was presumably introduced at some point between F28 and F38 but which didn't get automatically added in my case because well who knows. That was literally the only thing I needed to fix up after the upgrade, and on the next reboot I was presented with a gdm prompt and had a fully functional F38 machine.
You should not do this. I should not do this. This was a terrible idea. Any situation where you're binary patching your package manager to get it to let you do something is obviously a bad situation. And with hindsight performing 5 independent upgrades might have been faster. But that would have just involved me typing the same thing 5 times, while this way I learned something. And what I learned is "Terrible ideas sometimes work and so you should definitely act upon them rather than doing the sensible thing", so like I said, you should not do this in case you learn the same lesson.
Photo by Taylor Vick (Unsplash)
Linux networking can be confusing due to the wide range of technology stacks and tools in use, in addition to the complexity of the surrounding network environment. The configuration of bridges, bonds, VRFs or routes can be done programmatically, declaratively, manually or with automated with tools like ifupdown, ifupdown2, ifupdown-ng, iproute2, NetworkManager, systemd-networkd and others. Each of these tools use different formats and locations to store their configuration files. Netplan, a utility for easily configuring networking on a Linux system, is designed to unify and standardise how administrators interact with these underlying technologies. Starting from a YAML description of the required network interfaces and what each should be configured to do, Netplan will generate all the necessary configuration for your chosen tool.
In this article, we will provide an overview of how Ubuntu uses Netplan to manage Linux networking in a unified way. By creating a common interface across two disparate technology stacks, IT administrators benefit from a unified experience across both desktops and servers whilst retaining the unique advantages of the underlying tech.
But first, let s start with a bit of history and show where we are today.
The history of Netplan in Ubuntu
Starting with Ubuntu 16.10 and driven by the need to express network configuration in a common way across cloud metadata and other installer systems, we had the opportunity to switch to a network stack that integrates better with our dependency-based boot model. We chose systemd-networkd on server installations for its active upstream community and because it was already part of Systemd and therefore included in any Ubuntu base installation. It has a much better outlook for the future, using modern development techniques, good test coverage and CI integration, compared to the ifupdown tool we used previously. On desktop installations, we kept using NetworkManager due to its very good integration with the user interface.
Having to manage and configure two separate network stacks, depending on the Ubuntu variant in use, can be confusing, and we wanted to provide a streamlined user experience across any flavour of Ubuntu. Therefore, we introduced Netplan.io as a control layer above systemd-networkd and NetworkManager. Netplan takes declarative YAML files from /etc/netplan/ as an input and generates corresponding network configuration for the relevant network stack backend in /run/systemd/network/ or /run/NetworkManager/ depending on the system configuration. All while keeping full flexibility to control the underlying network stack in its native way if need be.
Who is using Netplan?
Recent versions of Netplan are available and ready to be installed on many distributions, such as Ubuntu, Fedora, RedHat Enterprise Linux, Debian and Arch Linux.
Ubuntu
As stated above, Netplan has been installed by default on Ubuntu systems since 2016 and is therefore being used by millions of users across multiple long-term support versions of Ubuntu (18.04, 20.04, 22.04) on a day-to-day basis. This covers Ubuntu server scenarios primarily, such as bridges, bonding, VLANs, VXLANs, VRFs, IP tunnels or WireGuard tunnels, using systemd-networkd as the backend renderer.
On Ubuntu desktop systems, Netplan can be used manually through its declarative YAML configuration files, and it will handle those to configure the NetworkManager stack. Keep reading to get a glimpse of how this will be improved through automation and integration with the desktop stack in the future.
Cloud
It might not be as obvious, but many people have been using Netplan without knowing about it when configuring a public cloud instance on AWS, Google Cloud or elsewhere through cloud-init. This is because cloud-init s Networking Config Version 2 is a passthrough configuration to Netplan, which will then set up the underlying network stack on the given cloud instance. This is why Netplan is also a key package on the Debian distribution, for example, as it s being used by default on Debian cloud images, too.
Our vision for Linux networking
We know that Linux networking can be a beast, and we want to keep simple things simple. But also allow for custom setups of any complexity. With Netplan, the day-to-day networking needs are covered through easily comprehensible and nicely documented YAML files, that describe the desired state of the local network interfaces, which will be rendered into corresponding configuration files for the relevant network stack and applied at (re-)boot or at runtime, using the netplan apply CLI. For example /etc/netplan/lan.yaml:
Having a single source of truth for network configuration is also important for administrators, so they do not need to understand multiple network stacks, but can rely on the declarative data given in /etc/netplan/ to configure a system, independent of the underlying network configuration backend. This is also very helpful to seed the initial network configuration for new Linux installations, for example through installation systems such as Subiquity, Ubuntu s desktop installer or cloud-init across the public and private clouds.
In addition to describing and applying network configuration, the netplan status CLI can be used to query relevant data from the underlying network stack(s), such as systemd-networkd, NetworkManager or iproute2, and present them in a unified way.
At the Netplan project we strive for very high test automation and coverage with plenty of unit tests, integration tests and linting steps, across multiple Linux distros, which gives high confidence in also supporting more advanced networking use cases, such as Open vSwitch or SR-IOV network virtualization, in addition to normal wired (static IP, DHCP, routing), wireless (e.g. wwan modems, WPA2/3 connections, WiFi hotspot, controlling the regulatory domain, ) and common server scenarios.
Should there ever be a scenario that is not covered by Netplan natively, it allows for full flexibility to control the underlying network stack directly through systemd override configurations or NetworkManager passthrough settings in addition to having manual configuration side-by-side with interfaces controlled through Netplan.
The future of Netplan desktop integration
On workstations, the most common scenario is for end users to configure NetworkManager through its user interface tools, instead of driving it through Netplan s declarative YAML files, which makes use of NetworkManager s native configuration files. To avoid Netplan just handing over control to NetworkManager on such systems, we re working on a bidirectional integration between NetworkManager and Netplan to further improve the single source of truth use case on Ubuntu desktop installations.
Netplan is shipping a libnetplan library that provides an API to access Netplan s parser and validation internals, that can be used by NetworkManager to write back a network interface configuration. For instance, configuration given through NetworkManager s UI tools or D-Bus API can be exported to Netplan s native YAML format in the common location at /etc/netplan/. This way, administrators just need to care about Netplan when managing a fleet of Desktop installations. This solution is currently being used in more confined environments, like Ubuntu Core, when using the NetworkManager snap, and we will deliver it to generic Ubuntu desktop systems in 24.04 LTS.
In addition to NetworkManager, libnetplan can also be used to integrate with other tools in the networking space, such as cloud-init for improved validation of user data or installation systems when seeding new Linux images.
Conclusion
Overall, Netplan can be considered to be a good citizen within a network environment that plays hand-in-hand with other networking tools and makes it easy to control modern network stacks, such as systemd-networkd or NetworkManager in a common, streamlined and declarative way. It provides a single source of truth to network administrators about the network state, while keeping simple things simple, but allowing for arbitrarily complex custom setups. If you want to learn more, feel free to follow our activities on Netplan.io, GitHub, Launchpad, IRC or our Netplan Developer Diaries blog on discourse.
The phrase "Root of Trust" turns up at various points in discussions about verified boot and measured boot, and to a first approximation nobody is able to give you a coherent explanation of what it means[1]. The Trusted Computing Group has a fairly wordy definition, but (a) it's a lot of words and (b) I don't like it, so instead I'm going to start by defining a root of trust as "A thing that has to be trustworthy for anything else on your computer to be trustworthy".
(An aside: when I say "trustworthy", it is very easy to interpret this in a cynical manner and assume that "trust" means "trusted by someone I do not necessarily trust to act in my best interest". I want to be absolutely clear that when I say "trustworthy" I mean "trusted by the owner of the computer", and that as far as I'm concerned selling devices that do not allow the owner to define what's trusted is an extremely bad thing in the general case)
Let's take an example. In verified boot, a cryptographic signature of a component is verified before it's allowed to boot. A straightforward implementation of a verified boot implementation has the firmware verify the signature on the bootloader or kernel before executing it. In this scenario, the firmware is the root of trust - it's the first thing that makes a determination about whether something should be allowed to run or not[2]. As long as the firmware behaves correctly, and as long as there aren't any vulnerabilities in our boot chain, we know that we booted an OS that was signed with a key we trust.
But what guarantees that the firmware behaves correctly? What if someone replaces our firmware with firmware that trusts different keys, or hot-patches the OS as it's booting it? We can't just ask the firmware whether it's trustworthy - trustworthy firmware will say yes, but the thing about malicious firmware is that it can just lie to us (either directly, or by modifying the OS components it boots to lie instead). This is probably not sufficiently trustworthy!
Ok, so let's have the firmware be verified before it's executed. On Intel this is "Boot Guard", on AMD this is "Platform Secure Boot", everywhere else it's just "Secure Boot". Code on the CPU (either in ROM or signed with a key controlled by the CPU vendor) verifies the firmware[3] before executing it. Now the CPU itself is the root of trust, and, well, that seems reasonable - we have to place trust in the CPU, otherwise we can't actually do computing. We can now say with a reasonable degree of confidence (again, in the absence of vulnerabilities) that we booted an OS that we trusted. Hurrah!
Except. How do we know that the CPU actually did that verification? CPUs are generally manufactured without verification being enabled - different system vendors use different signing keys, so those keys can't be installed in the CPU at CPU manufacture time, and vendors need to do code development without signing everything so you can't require that keys be installed before a CPU will work. So, out of the box, a new CPU will boot anything without doing verification[4], and development units will frequently have no verification.
As a device owner, how do you tell whether or not your CPU has this verification enabled? Well, you could ask the CPU, but if you're doing that on a device that booted a compromised OS then maybe it's just hotpatching your OS so when you do that you just get RET_TRUST_ME_BRO even if the CPU is desperately waving its arms around trying to warn you it's a trap. This is, unfortunately, a problem that's basically impossible to solve using verified boot alone - if any component in the chain fails to enforce verification, the trust you're placing in the chain is misplaced and you are going to have a bad day.
So how do we solve it? The answer is that we can't simply ask the OS, we need a mechanism to query the root of trust itself. There's a few ways to do that, but fundamentally they depend on the ability of the root of trust to provide proof of what happened. This requires that the root of trust be able to sign (or cause to be signed) an "attestation" of the system state, a cryptographically verifiable representation of the security-critical configuration and code. The most common form of this is called "measured boot" or "trusted boot", and involves generating a "measurement" of each boot component or configuration (generally a cryptographic hash of it), and storing that measurement somewhere. The important thing is that it must not be possible for the running OS (or any pre-OS component) to arbitrarily modify these measurements, since otherwise a compromised environment could simply go back and rewrite history. One frequently used solution to this is to segregate the storage of the measurements (and the attestation of them) into a separate hardware component that can't be directly manipulated by the OS, such as a Trusted Platform Module. Each part of the boot chain measures relevant security configuration and the next component before executing it and sends that measurement to the TPM, and later the TPM can provide a signed attestation of the measurements it was given. So, an SoC that implements verified boot should create a measurement telling us whether verification is enabled - and, critically, should also create a measurement if it isn't. This is important because failing to measure the disabled state leaves us with the same problem as before; someone can replace the mutable firmware code with code that creates a fake measurement asserting that verified boot was enabled, and if we trust that we're going to have a bad time.
(Of course, simply measuring the fact that verified boot was enabled isn't enough - what if someone replaces the CPU with one that has verified boot enabled, but trusts keys under their control? We also need to measure the keys that were used in order to ensure that the device trusted only the keys we expected, otherwise again we're going to have a bad time)
So, an effective root of trust needs to:
1) Create a measurement of its verified boot policy before running any mutable code 2) Include the trusted signing key in that measurement 3) Actually perform that verification before executing any mutable code
and from then on we're in the hands of the verified code actually being trustworthy, and it's probably written in C so that's almost certainly false, but let's not try to solve every problem today.
Does anything do this today? As far as I can tell, Intel's Boot Guard implementation does. Based on publicly available documentation I can't find any evidence that AMD's Platform Secure Boot does (it does the verification, but it doesn't measure the policy beforehand, so it seems spoofable), but I could be wrong there. I haven't found any general purpose non-x86 parts that do, but this is in the realm of things that SoC vendors seem to believe is some sort of value-add that can only be documented under NDAs, so please do prove me wrong. And then there are add-on solutions like Titan, where we delegate the initial measurement and validation to a separate piece of hardware that measures the firmware as the CPU reads it, rather than requiring that the CPU do it.
But, overall, the situation isn't great. On many platforms there's simply no way to prove that you booted the code you expected to boot. People have designed elaborate security implementations that can be bypassed in a number of ways.
[1] In this respect it is extremely similar to "Zero Trust" [2] This is a bit of an oversimplification - once we get into dynamic roots of trust like Intel's TXT this story gets more complicated, but let's stick to the simple case today [3] I'm kind of using "firmware" in an x86ish manner here, so for embedded devices just think of "firmware" as "the first code executed out of flash and signed by someone other than the SoC vendor" [4] In the Intel case this isn't strictly true, since the keys are stored in the motherboard chipset rather than the CPU, and so taking a board with Boot Guard enabled and swapping out the CPU won't disable Boot Guard because the CPU reads the configuration from the chipset. But many mobile Intel parts have the chipset in the same package as the CPU, so in theory swapping out that entire package would disable Boot Guard. I am not good enough at soldering to demonstrate that.
Reduce the size of your c: partition to the smallest it can be and then turn off windows with the understanding that you will never boot this system on the iron ever again.
Boot into a netinst installer image (no GUI). hold alt and press left arrow a few times until you get to a prompt to press enter. Press enter.
In this example /dev/sda is your windows disk which contains the c: partition
and /dev/disk/by-id/usb0 is the USB-3 attached SATA controller that you have your SSD attached to (please find an example attached). This SSD should be equal to or larger than the windows disk for best compatability.
To find the literal path names of your detected drives you can run fdisk -l. Pay attention to the names of the partitions and the sizes of the drives to help determine which is which.
Once you have a shell in the netinst installer, you should maybe be able to run a command like the following. This will duplicate the disk located at if (in file) to the disk located at of (out file) while showing progress as the status.
If you confirm that dd is available on the netinst image and the previous command runs successfully, test that your windows partition is visible in the new disk s partition table. The start block of the windows partition on each should match, as should the partition size.
fdisk -l /dev/disk/by-id/usb0
fdisk -l /dev/sda
If the output from the first is the same as the output from the second, then you are probably safe to proceed.
Once you confirm that you have made and tested a full copy of the blocks from your windows drive saved on your usb disk, nuke your windows partition table from orbit.
dd if=/dev/zero of=/dev/sda bs=1M count=42
You can press alt-f1 to return to the Debian installer now. Follow the instructions to install Debian. Don t forget to remove all attached USB drives.
Once you install Debian, press ctrl-alt-f3 to get a root shell.
Add your user to the sudoers group:
# adduser cjac sudoers
log out
# exit
log in as your user and confirm that you have sudo
$ sudo ls
Don t forget to read the spider man advice
enter your password
you ll need to install virt-manager. I think this should help:
I personally create a volume group called /dev/vg00 for the stuff I want to run raw and instead of converting to qcow2 like all of the other users do, I instead write it to a new logical volume.
sudo lvcreate /dev/vg00 -n windows -L 42G # or however large your drive was
sudo dd if=/dev/disk/by-id/usb0 of=/dev/vg00/windows status=progress
Now that you ve got the qcow2 file created, press alt-left until you return to your GDM session.
The apt-get install command above installed virt-manager, so log in to your system if you haven t already and open up gnome-terminal by pressing the windows key or moving your mouse/gesture to the top left of your screen. Type in gnome-terminal and either press enter or click/tap on the icon.
I like to run this full screen so that I feel like I m in a space ship. If you like to feel like you re in a spaceship, too, press F11.
You can start virt-manager from this shell or you can press the windows key and type in virt-manager and press enter. You ll want the shell to run commands such as virsh console windows or virsh list
When virt-manager starts, right click on QEMU/KVM and select New.
In the New VM window, select Import existing disk image
When prompted for the path to the image, use the one we created with sudo qemu-img convert above.
Select the version of Windows you want.
Select memory and CPUs to allocate to the VM.
Tick the Customize configuration before install box
If you re prompted to enable the default network, do so now.
The default hardware layout should probably suffice. Get it as close to the underlying hardware as it is convenient to do. But Windows is pretty lenient these days about virtualizing licensed windows instances so long as they re not running in more than one place at a time.
Good luck! Leave comments if you have questions.
Welcome to the May 2023 report from the Reproducible Builds project
In our reports, we outline the most important things that we have been up to over the past month. As always, if you are interested in contributing to the project, please visit our Contribute page on our website.
When using open-source NPM packages, most developers download prebuilt packages on npmjs.com instead of building those packages from available source, and implicitly trust the downloaded packages. However, it is unknown whether the blindly trusted prebuilt NPM packages are reproducible (i.e., whether there is always a verifiable path from source code to any published NPM package). [ ] We downloaded versions/releases of 226 most popularly used NPM packages and then built each version with the available source on GitHub. Next, we applied a differencing tool to compare the versions we built against versions downloaded from NPM, and further inspected any reported difference.
The paper reports that among the 3,390 versions of the 226 packages, only 2,087 versions are reproducible, and furthermore that multiple factors contribute to the non-reproducibility including flexible versioning information in package.json file and the divergent behaviors between distinct versions of tools used in the build process. The paper concludes with insights for future verifiable build procedures.
Unfortunately, a PDF is not available publically yet, but a Digital Object Identifier (DOI) is available on the paper s IEEE page.
Elsewhere in academia, Betul Gokkaya, Leonardo Aniello and Basel Halak of the School of Electronics and Computer Science at the University of Southampton published a new paper containing a broad overview of attacks and comprehensive risk assessment for software supply chain security.
Their paper, titled Software supply chain: review of attacks, risk assessment strategies and security controls, analyses the most common software supply-chain attacks by providing the latest trend of analyzed attack, and identifies the security risks for open-source and third-party software supply chains. Furthermore, their study introduces unique security controls to mitigate analyzed cyber-attacks and risks by linking them with real-life security incidence and attacks . (arXiv.org, PDF)
NixOS is now tracking two new reports at reproducible.nixos.org. Aside from the collection of build-time dependencies of the minimal and Gnome installation ISOs, this page now also contains reports that are restricted to the artifacts that make it into the image. The minimal ISO is currently reproducible except for Python 3.10, which hopefully will be resolved with the coming update to Python version 3.11.
On our rb-general mailing list this month:
David A. Wheeler started a thread noting that the OSSGadget project s oss-reproducible tool was measuring something related to but not the same as reproducible builds. Initially they had adopted the term semantically reproducible build term for what it measured, which they defined as being if its build results can be either recreated exactly (a bit for bit reproducible build), or if the differences between the release package and a rebuilt package are not expected to produce functional differences in normal cases. This generated a significant number of replies, and several were concerned that people might confuse what they were measuring with reproducible builds . After discussion, the OSSGadget developers decided to switch to the term semantically equivalent for what they measured in order to reduce the risk of confusion.
Vagrant Cascadian (vagrantc) posted an update about GCC, binutils, and Debian s build-essential set with some progress, some hope, and I daresay, some fears .
Lastly, kpcyrd asked a question about building a reproducible Linux kernel package for Arch Linux (answered by Arnout Engelen). In the same, thread David A. Wheeler pointed out that the Linux Kernel documentation has a chapter about Reproducible kernel builds now as well.
In Debian this month, nine reviews of Debian packages were added, 20 were updated and 6 were removed this month, all adding to our knowledge about identified issues. In addition, Vagrant Cascadian added a link to the source code causing various ecbuild issues. []
The F-Droid project updated its Inclusion How-To with a new section explaining why it considers reproducible builds to be best practice and hopes developers will support the team s efforts to make as many (new) apps reproducible as it reasonably can.
In diffoscope development this month, version 242 was uploaded to Debian unstable by Chris Lamb who also made the following changes:
If binwalk is not available, ensure the user knows they may be missing more info. []
Factor out generating a human-readable comment when missing a Python module. []
In addition, Mattia Rizzolo documented how to (re)-produce a binary blob in the code [] and Vagrant Cascadian updated the version of diffoscope in GNU Guix to 242 [].
reprotest is our tool for building the same source code twice in different environments and then checking the binaries produced by each build for any differences. This month, Holger Levsen uploaded versions 0.7.24 and 0.7.25 to Debian unstable which added support for Tox versions 3 and 4 with help from Vagrant Cascadian [][][]
Upstream patches
The Reproducible Builds project detects, dissects and attempts to fix as many currently-unreproducible packages as possible. We endeavour to send all of our patches upstream where appropriate. This month, we wrote a large number of such patches, including:
In addition, Jason A. Donenfeld filed a bug (now fixed in the latest alpha version) in the Android issue tracker to report that generateLocaleConfig in Android Gradle Plugin version 8.1.0 generates XML files using non-deterministic ordering, breaking reproducible builds. []
Testing framework
The Reproducible Builds project operates a comprehensive testing framework (available at tests.reproducible-builds.org) in order to check packages and other artifacts for reproducibility. In May, a number of changes were made by Holger Levsen:
Update the kernel configuration of arm64 nodes only put required modules in the initrd to save space in the /boot partition. []
A huge number of changes to a new tool to document/track Jenkins node maintenance, including adding --fetch, --help, --no-future and --verbose options [][][][] as well as adding a suite of new actions, such as apt-upgrade, command, deploy-git, rmstamp, etc. [][][][] in addition a significant amount of refactoring [][][][].
Issue warnings if apt has updates to install. []
Allow Jenkins to run apt get update in maintenance job. []
Installed bind9-dnsutils on some Ubuntu 18.04 nodes. [][]
Fixed the Jenkins shell monitor to correctly deal with little-used directories. []
Updated the node health check to warn when apt upgrades are available. []
Performed some node maintenance. []
In addition, Vagrant Cascadian added the nocheck, nopgo and nolto when building gcc-* and binutils packages [] as well as performed some node maintenance [][]. In addition, Roland Clobus updated the openQA configuration to specify longer timeouts and access to the developer mode [] and updated the URL used for reproducible Debian Live images [].
If you are interested in contributing to the Reproducible Builds project, please visit our Contribute page on our website. However, you can get in touch with us via:
Hello folks!
We recently received a case letting us know that Dataproc 2.1.1 was unable to write to a BigQuery table with a column of type JSON. Although the BigQuery connector for Spark has had support for JSON columns since 0.28.0, the Dataproc images on the 2.1 line still cannot create tables with JSON columns or write to existing tables with JSON columns.
The customer has graciously granted permission to share the code we developed to allow this operation. So if you are interested in working with JSON column tables on Dataproc 2.1 please continue reading!
Use the following gcloud command to create your single-node dataproc cluster:
The following file is the Scala code used to write JSON structured data to a BigQuery table using Spark. The file following this one can be executed from your single-node Dataproc cluster.
Main.scala
import org.apache.spark.sql.functions.col
import org.apache.spark.sql.types. Metadata, StringType, StructField, StructType
import org.apache.spark.sql. Row, SaveMode, SparkSession
import org.apache.spark.sql.avro
import org.apache.avro.specific
  val env = "x"
  val my_bucket = "cjac-docker-on-yarn"
  val my_table = "dataset.testavro2"
    val spark = env match
      case "local" =>
        SparkSession
          .builder()
          .config("temporaryGcsBucket", my_bucket)
          .master("local")
          .appName("isssue_115574")
          .getOrCreate()
      case _ =>
        SparkSession
          .builder()
          .config("temporaryGcsBucket", my_bucket)
          .appName("isssue_115574")
          .getOrCreate()

  // create DF with some data
  val someData = Seq(
    Row(""" "name":"name1", "age": 10  """, "id1"),
    Row(""" "name":"name2", "age": 20  """, "id2")
  )
  val schema = StructType(
    Seq(
      StructField("user_age", StringType, true),
      StructField("id", StringType, true)
    )
  )
  val avroFileName = s"gs://$ my_bucket /issue_115574/someData.avro"

  val someDF = spark.createDataFrame(spark.sparkContext.parallelize(someData), schema)
  someDF.write.format("avro").mode("overwrite").save(avroFileName)
  val avroDF = spark.read.format("avro").load(avroFileName)
  // set metadata
  val dfJSON = avroDF
    .withColumn("user_age_no_metadata", col("user_age"))
    .withMetadata("user_age", Metadata.fromJson(""" "sqlType":"JSON" """))
  dfJSON.show()
  dfJSON.printSchema
  // write to BigQuery
  dfJSON.write.format("bigquery")
    .mode(SaveMode.Overwrite)
    .option("writeMethod", "indirect")
    .option("intermediateFormat", "avro")
    .option("useAvroLogicalTypes", "true")
    .option("table", my_table)
    .save()
#!/bin/bash
PROJECT_ID=set-yours-here
DATASET_NAME=dataset
TABLE_NAME=testavro2
# We have to remove all of the existing spark bigquery jars from the local
# filesystem, as we will be using the symbols from the
# spark-3.3-bigquery-0.30.0.jar below.  Having existing jar files on the
# local filesystem will result in those symbols having higher precedence
# than the one loaded with the spark-shell.
sudo find /usr -name 'spark*bigquery*jar' -delete
# Remove the table from the bigquery dataset if it exists
bq rm -f -t $PROJECT_ID:$DATASET_NAME.$TABLE_NAME
# Create the table with a JSON type column
bq mk --table $PROJECT_ID:$DATASET_NAME.$TABLE_NAME \
  user_age:JSON,id:STRING,user_age_no_metadata:STRING
# Load the example Main.scala
spark-shell -i Main.scala \
  --jars /usr/lib/spark/external/spark-avro.jar,gs://spark-lib/bigquery/spark-3.3-bigquery-0.30.0.jar
# Show the table schema when we use  bq mk --table  and then load the avro
bq query --use_legacy_sql=false \
  "SELECT ddl FROM $DATASET_NAME.INFORMATION_SCHEMA.TABLES where table_name='$TABLE_NAME'"
# Remove the table so that we can see that the table is created should it not exist
bq rm -f -t $PROJECT_ID:$DATASET_NAME.$TABLE_NAME
# Dynamically generate a DataFrame, store it to avro, load that avro,
# and write the avro to BigQuery, creating the table if it does not already exist
spark-shell -i Main.scala \
  --jars /usr/lib/spark/external/spark-avro.jar,gs://spark-lib/bigquery/spark-3.3-bigquery-0.30.0.jar
# Show that the table schema does not differ from one created with a bq mk --table
bq query --use_legacy_sql=false \
  "SELECT ddl FROM $DATASET_NAME.INFORMATION_SCHEMA.TABLES where table_name='$TABLE_NAME'"
Google BigQuery has supported JSON data since October of 2022, but until now, it has not been possible, on generally available Dataproc clusters, to interact with these columns using the Spark BigQuery Connector.
JSON column type support was introduced in spark-bigquery-connector release 0.28.0.
These instructions are for qotom devices Q515P and Q1075GE. You can order one from Amazon or directly from Cherry Ni <export03@qotom.com>. Instructions are for those coming from Windows.
Prerequisites:
The details of your wireless network including wireless network ID (SSID), WPA password, gateway address and network prefix length
To find your windows network details, run the following command at the command prompt:
netsh interface ip show addresses
Here s my output:
PS C:\Users\cjcol> netsh interface ip show addresses "Wi-Fi"
Configuration for interface "Wi-Fi"
    DHCP enabled:                         Yes
    IP Address:                           172.16.79.53
    Subnet Prefix:                        172.16.79.0/24 (mask 255.255.255.0)
    Default Gateway:                      172.16.79.1
    Gateway Metric:                       0
    InterfaceMetric:                      50
Did you follow the instructions linked above in the prerequisites section? If not, take a moment to do so now.
Open Rufus and select the proxmox iso which you downloaded.
You may be warned that Rufus will be acting as dd.
Don t forget to select the USB drive that you want to write the image to. In my example, the device is creatively called NO_LABEL .
You may be warned that re-imaging the USB disk will result in the previous data on the USB disk being lost.
Once the process is complete, the application will indicate that it is complete.
You should now have a USB disk with the Proxmox installer image on it. Place the USB disk into one of the blue, USB-3.0, USB-A slots on the Qotom device so that the system can read the installer image from it at full speed. The Proxmox installer requires a keyboard, video and mouse. Please attach these to the device along with inserting the USB disk you just created.
Press the power button on the Qotom device. Press the F11 key repeatedly until you see the AMI BIOS menu. Press F11 a couple more times. You ll be presented with a boot menu. One of the options will launch the Proxmox installer. By trial and error, I found that the correct boot menu option was UEFI OS
Once you select the correct option, you will be presented with a menu that looks like this. Select the default option and install.
During the install, you will be presented with an option of the block device to install to. I think there s only a single block device in this celeron, but if there are more than one, I prefer the smaller one for the ProxMox OS. I also make a point to limit the size of the root filesystem to 16G. I think it will take up the entire volume group if you don t set a limit.
Okay, I ll do another install and select the correct filesystem.
If you read this far and want me to add some more screenshots and better instructions, leave a comment.
(Edit 2023-05-10: This has now launched for a subset of Twitter users. The code that existed to notify users that device identities had changed does not appear to have been enabled - as a result, in its current form, Twitter can absolutely MITM conversations and read your messages)
Elon Musk appeared on an interview with Tucker Carlson last month, with one of the topics being the fact that Twitter could be legally compelled to hand over users' direct messages to government agencies since they're held on Twitter's servers and aren't encrypted. Elon talked about how they were in the process of implementing proper encryption for DMs that would prevent this - "You could put a gun to my head and I couldn't tell you. That's how it should be."
tl;dr - in the current implementation, while Twitter could subvert the end-to-end nature of the encryption, it could not do so without users being notified. If any user involved in a conversation were to ignore that notification, all messages in that conversation (including ones sent in the past) could then be decrypted. This isn't ideal, but it still seems like an improvement over having no encryption at all. More technical discussion follows.
For context: all information about Twitter's implementation here has been derived from reverse engineering version 9.86.0 of the Android client and 9.56.1 of the iOS client (the current versions at time of writing), and the feature hasn't yet launched. While it's certainly possible that there could be major changes in the protocol between now launch, Elon has asserted that they plan to launch the feature this week so it's plausible that this reflects what'll ship.
For it to be impossible for Twitter to read DMs, they need to not only be encrypted, they need to be encrypted with a key that's not available to Twitter. This is what's referred to as "end-to-end encryption", or e2ee - it means that the only components in the communication chain that have access to the unencrypted data are the endpoints. Even if the message passes through other systems (and even if it's stored on other systems), those systems do not have access to the keys that would be needed to decrypt the data.
End-to-end encrypted messengers were initially popularised by Signal, but the Signal protocol has since been incorporated into WhatsApp and is probably much more widely used there. Millions of people per day are sending messages to each other that pass through servers controlled by third parties, but those third parties are completely unable to read the contents of those messages. This is the scenario that Elon described, where there's no degree of compulsion that could cause the people relaying messages to and from people to decrypt those messages afterwards.
But for this to be possible, both ends of the communication need to be able to encrypt messages in a way the other end can decrypt. This is usually performed using AES, a well-studied encryption algorithm with no known significant weaknesses. AES is a form of what's referred to as a symmetric encryption, one where encryption and decryption are performed with the same key. This means that both ends need access to that key, which presents us with a bootstrapping problem. Until a shared secret is obtained, there's no way to communicate securely, so how do we generate that shared secret? A common mechanism for this is something called Diffie Hellman key exchange, which makes use of asymmetric encryption. In asymmetric encryption, an encryption key can be split into two components - a public key and a private key. Both devices involved in the communication combine their private key and the other party's public key to generate a secret that can only be decoded with access to the private key. As long as you know the other party's public key, you can now securely generate a shared secret with them. Even a third party with access to all the public keys won't be able to identify this secret. Signal makes use of a variation of Diffie-Hellman called Extended Triple Diffie-Hellman that has some desirable properties, but it's not strictly necessary for the implementation of something that's end-to-end encrypted.
Although it was rumoured that Twitter would make use of the Signal protocol, and in fact there are vestiges of code in the Twitter client that still reference Signal, recent versions of the app have shipped with an entirely different approach that appears to have been written from scratch. It seems simple enough. Each device generates an asymmetric keypair using the NIST P-256 elliptic curve, along with a device identifier. The device identifier and the public half of the key are uploaded to Twitter using a new API endpoint called /1.1/keyregistry/register. When you want to send an encrypted DM to someone, the app calls /1.1/keyregistry/extract_public_keys with the IDs of the users you want to communicate with, and gets back a list of their public keys. It then looks up the conversation ID (a numeric identifier that corresponds to a given DM exchange - for a 1:1 conversation between two people it doesn't appear that this ever changes, so if you DMed an account 5 years ago and then DM them again now from the same account, the conversation ID will be the same) in a local database to retrieve a conversation key. If that key doesn't exist yet, the sender generates a random one. The message is then encrypted with the conversation key using AES in GCM mode, and the conversation key is then put through Diffie-Hellman with each of the recipients' public device keys. The encrypted message is then sent to Twitter along with the list of encrypted conversation keys. When each of the recipients' devices receives the message it checks whether it already has a copy of the conversation key, and if not performs its half of the Diffie-Hellman negotiation to decrypt the encrypted conversation key. One it has the conversation key it decrypts it and shows it to the user.
What would happen if Twitter changed the registered public key associated with a device to one where they held the private key, or added an entirely new device to a user's account? If the app were to just happily send a message with the conversation key encrypted with that new key, Twitter would be able to decrypt that and obtain the conversation key. Since the conversation key is tied to the conversation, not any given pair of devices, obtaining the conversation key means you can then decrypt every message in that conversation, including ones sent before the key was obtained.
(An aside: Signal and WhatsApp make use of a protocol called Sesame which involves additional secret material that's shared between every device a user owns, hence why you have to do that QR code dance whenever you add a new device to your account. I'm grossly over-simplifying how clever the Signal approach is here, largely because I don't understand the details of it myself. The Signal protocol uses something called the Double Ratchet Algorithm to implement the actual message encryption keys in such a way that even if someone were able to successfully impersonate a device they'd only be able to decrypt messages sent after that point even if they had encrypted copies of every previous message in the conversation)
How's this avoided? Based on the UI that exists in the iOS version of the app, in a fairly straightforward way - each user can only have a single device that supports encrypted messages. If the user (or, in our hypothetical, a malicious Twitter) replaces the device key, the client will generate a notification. If the user pays attention to that notification and verifies with the recipient through some out of band mechanism that the device has actually been replaced, then everything is fine. But, if any participant in the conversation ignores this warning, the holder of the subverted key can obtain the conversation key and decrypt the entire history of the conversation. That's strictly worse than anything based on Signal, where such impersonation would simply not work, but even in the Twitter case it's not possible for someone to silently subvert the security.
So when Elon says Twitter wouldn't be able to decrypt these messages even if someone held a gun to his head, there's a condition applied to that - it's true as long as nobody fucks up. This is clearly better than the messages just not being encrypted at all in the first place, but overall it's a weaker solution than Signal. If you're currently using Twitter DMs, should you turn on encryption? As long as the limitations aren't too limiting, definitely! Should you use this in preference to Signal or WhatsApp? Almost certainly not. This seems like a genuine incremental improvement, but it'd be easy to interpret what Elon says as providing stronger guarantees than actually exist.
Here's an article from a French anarchist describing how his (encrypted) laptop was seized after he was arrested, and material from the encrypted partition has since been entered as evidence against him. His encryption password was supposedly greater than 20 characters and included a mixture of cases, numbers, and punctuation, so in the absence of any sort of opsec failures this implies that even relatively complex passwords can now be brute forced, and we should be transitioning to even more secure passphrases.
Or does it? Let's go into what LUKS is doing in the first place. The actual data is typically encrypted with AES, an extremely popular and well-tested encryption algorithm. AES has no known major weaknesses and is not considered to be practically brute-forceable - at least, assuming you have a random key. Unfortunately it's not really practical to ask a user to type in 128 bits of binary every time they want to unlock their drive, so another approach has to be taken.
This is handled using something called a "key derivation function", or KDF. A KDF is a function that takes some input (in this case the user's password) and generates a key. As an extremely simple example, think of MD5 - it takes an input and generates a 128-bit output, so we could simply MD5 the user's password and use the output as an AES key. While this could technically be considered a KDF, it would be an extremely bad one! MD5s can be calculated extremely quickly, so someone attempting to brute-force a disk encryption key could simply generate the MD5 of every plausible password (probably on a lot of machines in parallel, likely using GPUs) and test each of them to see whether it decrypts the drive.
(things are actually slightly more complicated than this - your password is used to generate a key that is then used to encrypt and decrypt the actual encryption key. This is necessary in order to allow you to change your password without having to re-encrypt the entire drive - instead you simply re-encrypt the encryption key with the new password-derived key. This also allows you to have multiple passwords or unlock mechanisms per drive)
Good KDFs reduce this risk by being what's technically referred to as "expensive". Rather than performing one simple calculation to turn a password into a key, they perform a lot of calculations. The number of calculations performed is generally configurable, in order to let you trade off between the amount of security (the number of calculations you'll force an attacker to perform when attempting to generate a key from a potential password) and performance (the amount of time you're willing to wait for your laptop to generate the key after you type in your password so it can actually boot). But, obviously, this tradeoff changes over time - defaults that made sense 10 years ago are not necessarily good defaults now. If you set up your encrypted partition some time ago, the number of calculations required may no longer be considered up to scratch.
And, well, some of these assumptions are kind of bad in the first place! Just making things computationally expensive doesn't help a lot if your adversary has the ability to test a large number of passwords in parallel. GPUs are extremely good at performing the sort of calculations that KDFs generally use, so an attacker can "just" get a whole pile of GPUs and throw them at the problem. KDFs that are computationally expensive don't do a great deal to protect against this. However, there's another axis of expense that can be considered - memory. If the KDF algorithm requires a significant amount of RAM, the degree to which it can be performed in parallel on a GPU is massively reduced. A Geforce 4090 may have 16,384 execution units, but if each password attempt requires 1GB of RAM and the card only has 24GB on board, the attacker is restricted to running 24 attempts in parallel.
So, in these days of attackers with access to a pile of GPUs, a purely computationally expensive KDF is just not a good choice. And, unfortunately, the subject of this story was almost certainly using one of those. Ubuntu 18.04 used the LUKS1 header format, and the only KDF supported in this format is PBKDF2. This is not a memory expensive KDF, and so is vulnerable to GPU-based attacks. But even so, systems using the LUKS2 header format used to default to argon2i, again not a memory expensive KDFwhich is memory strong, but not designed to be resistant to GPU attack (thanks to the comments pointing out my misunderstanding here). New versions default to argon2id, which is. You want to be using argon2id.
What makes this worse is that distributions generally don't update this in any way. If you installed your system and it gave you pbkdf2 as your KDF, you're probably still using pbkdf2 even if you've upgraded to a system that would use argon2id on a fresh install. Thankfully, this can all be fixed-up in place. But note that if anything goes wrong here you could lose access to all your encrypted data, so before doing anything make sure it's all backed up (and figure out how to keep said backup secure so you don't just have your data seized that way).
First, make sure you're running as up-to-date a version of your distribution as possible. Having tools that support the LUKS2 format doesn't mean that your distribution has all of that integrated, and old distribution versions may allow you to update your LUKS setup without actually supporting booting from it. Also, if you're using an encrypted /boot, stop now - very recent versions of grub2 support LUKS2, but they don't support argon2id, and this will render your system unbootable.
Next, figure out which device under /dev corresponds to your encrypted partition. Run
lsblk
and look for entries that have a type of "crypt". The device above that in the tree is the actual encrypted device. Record that name, and run
(Edit to add: Once everything is working, delete this backup! It contains the old weak key, and someone with it can potentially use that to brute force your disk encryption key using the old KDF even if you've updated the on-disk KDF.)
Next, run
sudo cryptsetup luksDump /dev/whatever
and look for the Version: line. If it's version 1, you need to update the header to LUKS2. Run
and follow the prompts. Make sure your system still boots, and if not go back and restore the backup of your header. Assuming everything is ok at this point, run
sudo cryptsetup luksDump /dev/whatever
again and look for the PBKDF: line in each keyslot (pay attention only to the keyslots, ignore any references to pbkdf2 that come after the Digests: line). If the PBKDF is either "pbkdf2" or "argon2i" you should convert to argon2id. Run the following:
and follow the prompts. If you have multiple passwords associated with your drive you'll have multiple keyslots, and you'll need to repeat this for each password.
Distributions! You should really be handling this sort of thing on upgrade. People who installed their systems with your encryption defaults several years ago are now much less secure than people who perform a fresh install today. Please please please do something about this.
CPUs can't do anything without being told what to do, which leaves the obvious problem of how do you tell a CPU to do something in the first place. On many CPUs this is handled in the form of a reset vector - an address the CPU is hardcoded to start reading instructions from when power is applied. The address the reset vector points to will typically be some form of ROM or flash that can be read by the CPU even if no other hardware has been configured yet. This allows the system vendor to ship code that will be executed immediately after poweron, configuring the rest of the hardware and eventually getting the system into a state where it can run user-supplied code.
The specific nature of the reset vector on x86 systems has varied over time, but it's effectively always been 16 bytes below the top of the address space - so, 0xffff0 on the 20-bit 8086, 0xfffff0 on the 24-bit 80286, and 0xfffffff0 on the 32-bit 80386. Convention on x86 systems is to have RAM starting at address 0, so the top of address space could be used to house the reset vector with as low a probability of conflicting with RAM as possible.
The most notable thing about x86 here, though, is that when it starts running code from the reset vector, it's still in real mode. x86 real mode is a holdover from a much earlier era of computing. Rather than addresses being absolute (ie, if you refer to a 32-bit address, you store the entire address in a 32-bit or larger register), they are 16-bit offsets that are added to the value stored in a "segment register". Different segment registers existed for code, data, and stack, so a 16-bit address could refer to different actual addresses depending on how it was being interpreted - jumping to a 16 bit address would result in that address being added to the code segment register, while reading from a 16 bit address would result in that address being added to the data segment register, and so on. This is all in order to retain compatibility with older chips, to the extent that even 64-bit x86 starts in real mode with segments and everything (and, also, still starts executing at 0xfffffff0 rather than 0xfffffffffffffff0 - 64-bit mode doesn't support real mode, so there's no way to express a 64-bit physical address using the segment registers, so we still start just below 4GB even though we have massively more address space available).
Anyway. Everyone knows all this. For modern UEFI systems, the firmware that's launched from the reset vector then reprograms the CPU into a sensible mode (ie, one without all this segmentation bullshit), does things like configure the memory controller so you can actually access RAM (a process which involves using CPU cache as RAM, because programming a memory controller is sufficiently hard that you need to store more state than you can fit in registers alone, which means you need RAM, but you don't have RAM until the memory controller is working, but thankfully the CPU comes with several megabytes of RAM on its own in the form of cache, so phew). It's kind of ugly, but that's a consequence of a bunch of well-understood legacy decisions.
Except. This is not how modern Intel x86 boots. It's far stranger than that. Oh, yes, this is what it looks like is happening, but there's a bunch of stuff going on behind the scenes. Let's talk about boot security. The idea of any form of verified boot (such as UEFI Secure Boot) is that a signature on the next component of the boot chain is validated before that component is executed. But what verifies the first component in the boot chain? You can't simply ask the BIOS to verify itself - if an attacker can replace the BIOS, they can replace it with one that simply lies about having done so. Intel's solution to this is called Boot Guard.
But before we get to Boot Guard, we need to ensure the CPU is running in as bug-free a state as possible. So, when the CPU starts up, it examines the system flash and looks for a header that points at CPU microcode updates. Intel CPUs ship with built-in microcode, but it's frequently old and buggy and it's up to the system firmware to include a copy that's new enough that it's actually expected to work reliably. The microcode image is pulled out of flash, a signature is verified, and the new microcode starts running. This is true in both the Boot Guard and the non-Boot Guard scenarios. But for Boot Guard, before jumping to the reset vector, the microcode on the CPU reads an Authenticated Code Module (ACM) out of flash and verifies its signature against a hardcoded Intel key. If that checks out, it starts executing the ACM. Now, bear in mind that the CPU can't just verify the ACM and then execute it directly from flash - if it did, the flash could detect this, hand over a legitimate ACM for the verification, and then feed the CPU different instructions when it reads them again to execute them (a Time of Check vs Time of Use, or TOCTOU, vulnerability). So the ACM has to be copied onto the CPU before it's verified and executed, which means we need RAM, which means the CPU already needs to know how to configure its cache to be used as RAM.
Anyway. We now have an ACM loaded and verified, and it can safely be executed. The ACM does various things, but the most important from the Boot Guard perspective is that it reads a set of write-once fuses in the motherboard chipset that represent the SHA256 of a public key. It then reads the initial block of the firmware (the Initial Boot Block, or IBB) into RAM (or, well, cache, as previously described) and parses it. There's a block that contains a public key - it hashes that key and verifies that it matches the SHA256 from the fuses. It then uses that key to validate a signature on the IBB. If it all checks out, it executes the IBB and everything starts looking like the nice simple model we had before.
Except, well, doesn't this seem like an awfully complicated bunch of code to implement in real mode? And yes, doing all of this modern crypto with only 16-bit registers does sound like a pain. So, it doesn't. All of this is happening in a perfectly sensible 32 bit mode, and the CPU actually switches back to the awful segmented configuration afterwards so it's still compatible with an 80386 from 1986. The "good" news is that at least firmware can detect that the CPU has already configured the cache as RAM and can skip doing that itself.
I'm skipping over some steps here - the ACM actually does other stuff around measuring the firmware into the TPM and doing various bits of TXT setup for people who want DRTM in their lives, but the short version is that the CPU bootstraps itself into a state where it works like a modern CPU and then deliberately turns a bunch of the sensible functionality off again before it starts executing firmware. I'm also missing out the fact that this entire process only kicks off after the Management Engine says it can, which means we're waiting for an entirely independent x86 to boot an entire OS before our CPU even starts pretending to execute the system firmware.
Of course, as mentioned before, on modern systems the firmware will then reprogram the CPU into something actually sensible so OS developers no longer need to care about this[1][2], which means we've bounced between multiple states for no reason other than the possibility that someone wants to run legacy BIOS and then boot DOS on a CPU with like 5 orders of magnitude more transistors than the 8086.
tl;dr why can't my x86 wake up with the gin protected mode already inside it
[1] Ha uh except that on ACPI resume we're going to skip most of the firmware setup code so we still need to handle the CPU being in fucking 16-bit mode because suspend/resume is basically an extremely long reboot cycle
[2] Oh yeah also you probably have multiple cores on your CPU and well bad news about the state most of the cores are in when the OS boots because the firmware never started them up so they're going to come up in 16-bit real mode even if your boot CPU is already in 64-bit protected mode, unless you were using TXT in which case you have a different sort of nightmare that if we're going to try to map it onto real world nightmare concepts is one that involves a lot of teeth. Or, well, that used to be the case, but ACPI 6.4 (released in 2021) provides a mechanism for the OS to ask the firmware to wake the CPU up for it so this is invisible to the OS, but you're still relying on the firmware to actually do the heavy lifting here
I ve used hardware-backed OpenPGP keys since 2006 when I imported newly generated rsa1024 subkeys to a FSFE Fellowship card. This worked well for several years, and I recall buying more ZeitControl cards for multi-machine usage and backup purposes. As a side note, I recall being unsatisfied with the weak 1024-bit RSA subkeys at the time my primary key was a somewhat stronger 1280-bit RSA key created back in 2002 but OpenPGP cards at the time didn t support more than 1024 bit RSA, and were (and still often are) also limited to power-of-two RSA key sizes which I dislike.
I had my master key on disk with a strong password for a while, mostly to refresh expiration time of the subkeys and to sign other s OpenPGP keys. At some point I stopped carrying around encrypted copies of my master key. That was my main setup when I migrated to a new stronger RSA 3744 bit key with rsa2048 subkeys on a YubiKey NEO back in 2014. At that point, signing other s OpenPGP keys was a rare enough occurrence that I settled with bringing out my offline machine to perform this operation, transferring the public key to sign on USB sticks. In 2019 I re-evaluated my OpenPGP setup and ended up creating a offline Ed25519 key with subkeys on a FST-01G running Gnuk. My approach for signing other s OpenPGP keys were still to bring out my offline machine and sign things using the master secret using USB sticks for storage and transport. Which meant I almost never did that, because it took too much effort. So my 2019-era Ed25519 key still only has a handful of signatures on it, since I had essentially stopped signing other s keys which is the traditional way of getting signatures in return.
None of this caused any critical problem for me because I continued to use my old 2014-era RSA3744 key in parallel with my new 2019-era Ed25519 key, since too many systems didn t handle Ed25519. However, during 2022 this changed, and the only remaining environment that I still used my RSA3744 key for was in Debian and they require OpenPGP signatures on the new key to allow it to replace an older key. I was in denial about this sub-optimal solution during 2022 and endured its practical consequences, having to use the YubiKey NEO (which I had replaced with a permanently inserted YubiKey Nano at some point) for Debian-related purposes alone.
In December 2022 I bought a new laptop and setup a FST-01SZ with my Ed25519 key, and while I have taken a vacation from Debian, I continue to extend the expiration period on the old RSA3744-key in case I will ever have to use it again, so the overall OpenPGP setup was still sub-optimal. Having two valid OpenPGP keys at the same time causes people to use both for email encryption (leading me to have to use both devices), and the WKD Key Discovery protocol doesn t like two valid keys either. At FOSDEM 23 I ran into Andre Heinecke at GnuPG and I couldn t help complain about how complex and unsatisfying all OpenPGP-related matters were, and he mildly ignored my rant and asked why I didn t put the master key on another smartcard. The comment sunk in when I came home, and recently I connected all the dots and this post is a summary of what I did to move my offline OpenPGP master key to a Nitrokey Start.
First a word about device choice, I still prefer to use hardware devices that are as compatible with free software as possible, but the FST-01G or FST-01SZ are no longer easily available for purchase. I got a comment about Nitrokey start in my last post, and had two of them available to experiment with. There are things to dislike with the Nitrokey Start compared to the YubiKey (e.g., relative insecure chip architecture, the bulkier form factor and lack of FIDO/U2F/OATH support) but as far as I know there is no more widely available owner-controlled device that is manufactured for an intended purpose of implementing an OpenPGP card. Thus it hits the sweet spot for me.
Nitrokey Start
The first step is to run latest firmware on the Nitrokey Start for bug-fixes and important OpenSSH 9.0 compatibility and there are reproducible-built firmware published that you can install using pynitrokey. I run Trisquel 11 aramo on my laptop, which does not include the Python Pip package (likely because it promotes installing non-free software) so that was a slight complication. Building the firmware locally may have worked, and I would like to do that eventually to confirm the published firmware, however to save time I settled with installing the Ubuntu 22.04 packages on my machine:
$ sha256sum python3-pip*
ded6b3867a4a4cbaff0940cab366975d6aeecc76b9f2d2efa3deceb062668b1c  python3-pip_22.0.2+dfsg-1ubuntu0.2_all.deb
e1561575130c41dc3309023a345de337e84b4b04c21c74db57f599e267114325  python3-pip-whl_22.0.2+dfsg-1ubuntu0.2_all.deb
$ doas dpkg -i python3-pip*
...
$ doas apt install -f
...
$
Installing pynitrokey downloaded a bunch of dependencies, and it would be nice to audit the license and security vulnerabilities for each of them. (Verbose output below slightly redacted.)
jas@kaka:~$ pip3 install --user pynitrokey
Collecting pynitrokey
  Downloading pynitrokey-0.4.34-py3-none-any.whl (572 kB)
Collecting frozendict~=2.3.4
  Downloading frozendict-2.3.5-cp310-cp310-manylinux_2_17_x86_64.manylinux2014_x86_64.whl (113 kB)
Requirement already satisfied: click<9,>=8.0.0 in /usr/lib/python3/dist-packages (from pynitrokey) (8.0.3)
Collecting ecdsa
  Downloading ecdsa-0.18.0-py2.py3-none-any.whl (142 kB)
Collecting python-dateutil~=2.7.0
  Downloading python_dateutil-2.7.5-py2.py3-none-any.whl (225 kB)
Collecting fido2<2,>=1.1.0
  Downloading fido2-1.1.0-py3-none-any.whl (201 kB)
Collecting tlv8
  Downloading tlv8-0.10.0.tar.gz (16 kB)
  Preparing metadata (setup.py) ... done
Requirement already satisfied: certifi>=14.5.14 in /usr/lib/python3/dist-packages (from pynitrokey) (2020.6.20)
Requirement already satisfied: pyusb in /usr/lib/python3/dist-packages (from pynitrokey) (1.2.1.post1)
Collecting urllib3~=1.26.7
  Downloading urllib3-1.26.15-py2.py3-none-any.whl (140 kB)
Collecting spsdk<1.8.0,>=1.7.0
  Downloading spsdk-1.7.1-py3-none-any.whl (684 kB)
Collecting typing_extensions~=4.3.0
  Downloading typing_extensions-4.3.0-py3-none-any.whl (25 kB)
Requirement already satisfied: cryptography<37,>=3.4.4 in /usr/lib/python3/dist-packages (from pynitrokey) (3.4.8)
Collecting intelhex
  Downloading intelhex-2.3.0-py2.py3-none-any.whl (50 kB)
Collecting nkdfu
  Downloading nkdfu-0.2-py3-none-any.whl (16 kB)
Requirement already satisfied: requests in /usr/lib/python3/dist-packages (from pynitrokey) (2.25.1)
Collecting tqdm
  Downloading tqdm-4.65.0-py3-none-any.whl (77 kB)
Collecting nrfutil<7,>=6.1.4
  Downloading nrfutil-6.1.7.tar.gz (845 kB)
  Preparing metadata (setup.py) ... done
Requirement already satisfied: cffi in /usr/lib/python3/dist-packages (from pynitrokey) (1.15.0)
Collecting crcmod
  Downloading crcmod-1.7.tar.gz (89 kB)
  Preparing metadata (setup.py) ... done
Collecting libusb1==1.9.3
  Downloading libusb1-1.9.3-py3-none-any.whl (60 kB)
Collecting pc_ble_driver_py>=0.16.4
  Downloading pc_ble_driver_py-0.17.0-cp310-cp310-manylinux_2_17_x86_64.manylinux2014_x86_64.whl (2.9 MB)
Collecting piccata
  Downloading piccata-2.0.3-py3-none-any.whl (21 kB)
Collecting protobuf<4.0.0,>=3.17.3
  Downloading protobuf-3.20.3-cp310-cp310-manylinux_2_12_x86_64.manylinux2010_x86_64.whl (1.1 MB)
Collecting pyserial
  Downloading pyserial-3.5-py2.py3-none-any.whl (90 kB)
Collecting pyspinel>=1.0.0a3
  Downloading pyspinel-1.0.3.tar.gz (58 kB)
  Preparing metadata (setup.py) ... done
Requirement already satisfied: pyyaml in /usr/lib/python3/dist-packages (from nrfutil<7,>=6.1.4->pynitrokey) (5.4.1)
Requirement already satisfied: six>=1.5 in /usr/lib/python3/dist-packages (from python-dateutil~=2.7.0->pynitrokey) (1.16.0)
Collecting pylink-square<0.11.9,>=0.8.2
  Downloading pylink_square-0.11.1-py2.py3-none-any.whl (78 kB)
Collecting jinja2<3.1,>=2.11
  Downloading Jinja2-3.0.3-py3-none-any.whl (133 kB)
Collecting bincopy<17.11,>=17.10.2
  Downloading bincopy-17.10.3-py3-none-any.whl (17 kB)
Collecting fastjsonschema>=2.15.1
  Downloading fastjsonschema-2.16.3-py3-none-any.whl (23 kB)
Collecting astunparse<2,>=1.6
  Downloading astunparse-1.6.3-py2.py3-none-any.whl (12 kB)
Collecting oscrypto~=1.2
  Downloading oscrypto-1.3.0-py2.py3-none-any.whl (194 kB)
Collecting deepmerge==0.3.0
  Downloading deepmerge-0.3.0-py2.py3-none-any.whl (7.6 kB)
Collecting pyocd<=0.31.0,>=0.28.3
  Downloading pyocd-0.31.0-py3-none-any.whl (12.5 MB)
Collecting click-option-group<0.6,>=0.3.0
  Downloading click_option_group-0.5.5-py3-none-any.whl (12 kB)
Collecting pycryptodome<4,>=3.9.3
  Downloading pycryptodome-3.17-cp35-abi3-manylinux_2_17_x86_64.manylinux2014_x86_64.whl (2.1 MB)
Collecting pyocd-pemicro<1.2.0,>=1.1.1
  Downloading pyocd_pemicro-1.1.5-py3-none-any.whl (9.0 kB)
Requirement already satisfied: colorama<1,>=0.4.4 in /usr/lib/python3/dist-packages (from spsdk<1.8.0,>=1.7.0->pynitrokey) (0.4.4)
Collecting commentjson<1,>=0.9
  Downloading commentjson-0.9.0.tar.gz (8.7 kB)
  Preparing metadata (setup.py) ... done
Requirement already satisfied: asn1crypto<2,>=1.2 in /usr/lib/python3/dist-packages (from spsdk<1.8.0,>=1.7.0->pynitrokey) (1.4.0)
Collecting pypemicro<0.2.0,>=0.1.9
  Downloading pypemicro-0.1.11-py3-none-any.whl (5.7 MB)
Collecting libusbsio>=2.1.11
  Downloading libusbsio-2.1.11-py3-none-any.whl (247 kB)
Collecting sly==0.4
  Downloading sly-0.4.tar.gz (60 kB)
  Preparing metadata (setup.py) ... done
Collecting ruamel.yaml<0.18.0,>=0.17
  Downloading ruamel.yaml-0.17.21-py3-none-any.whl (109 kB)
Collecting cmsis-pack-manager<0.3.0
  Downloading cmsis_pack_manager-0.2.10-py2.py3-none-manylinux1_x86_64.whl (25.1 MB)
Collecting click-command-tree==1.1.0
  Downloading click_command_tree-1.1.0-py3-none-any.whl (3.6 kB)
Requirement already satisfied: bitstring<3.2,>=3.1 in /usr/lib/python3/dist-packages (from spsdk<1.8.0,>=1.7.0->pynitrokey) (3.1.7)
Collecting hexdump~=3.3
  Downloading hexdump-3.3.zip (12 kB)
  Preparing metadata (setup.py) ... done
Collecting fire
  Downloading fire-0.5.0.tar.gz (88 kB)
  Preparing metadata (setup.py) ... done
Requirement already satisfied: wheel<1.0,>=0.23.0 in /usr/lib/python3/dist-packages (from astunparse<2,>=1.6->spsdk<1.8.0,>=1.7.0->pynitrokey) (0.37.1)
Collecting humanfriendly
  Downloading humanfriendly-10.0-py2.py3-none-any.whl (86 kB)
Collecting argparse-addons>=0.4.0
  Downloading argparse_addons-0.12.0-py3-none-any.whl (3.3 kB)
Collecting pyelftools
  Downloading pyelftools-0.29-py2.py3-none-any.whl (174 kB)
Collecting milksnake>=0.1.2
  Downloading milksnake-0.1.5-py2.py3-none-any.whl (9.6 kB)
Requirement already satisfied: appdirs>=1.4 in /usr/lib/python3/dist-packages (from cmsis-pack-manager<0.3.0->spsdk<1.8.0,>=1.7.0->pynitrokey) (1.4.4)
Collecting lark-parser<0.8.0,>=0.7.1
  Downloading lark-parser-0.7.8.tar.gz (276 kB)
  Preparing metadata (setup.py) ... done
Requirement already satisfied: MarkupSafe>=2.0 in /usr/lib/python3/dist-packages (from jinja2<3.1,>=2.11->spsdk<1.8.0,>=1.7.0->pynitrokey) (2.0.1)
Collecting asn1crypto<2,>=1.2
  Downloading asn1crypto-1.5.1-py2.py3-none-any.whl (105 kB)
Collecting wrapt
  Downloading wrapt-1.15.0-cp310-cp310-manylinux_2_5_x86_64.manylinux1_x86_64.manylinux_2_17_x86_64.manylinux2014_x86_64.whl (78 kB)
Collecting future
  Downloading future-0.18.3.tar.gz (840 kB)
  Preparing metadata (setup.py) ... done
Collecting psutil>=5.2.2
  Downloading psutil-5.9.4-cp36-abi3-manylinux_2_12_x86_64.manylinux2010_x86_64.manylinux_2_17_x86_64.manylinux2014_x86_64.whl (280 kB)
Collecting capstone<5.0,>=4.0
  Downloading capstone-4.0.2-py2.py3-none-manylinux1_x86_64.whl (2.1 MB)
Collecting naturalsort<2.0,>=1.5
  Downloading naturalsort-1.5.1.tar.gz (7.4 kB)
  Preparing metadata (setup.py) ... done
Collecting prettytable<3.0,>=2.0
  Downloading prettytable-2.5.0-py3-none-any.whl (24 kB)
Collecting intervaltree<4.0,>=3.0.2
  Downloading intervaltree-3.1.0.tar.gz (32 kB)
  Preparing metadata (setup.py) ... done
Collecting ruamel.yaml.clib>=0.2.6
  Downloading ruamel.yaml.clib-0.2.7-cp310-cp310-manylinux_2_17_x86_64.manylinux2014_x86_64.manylinux_2_24_x86_64.whl (485 kB)
Collecting termcolor
  Downloading termcolor-2.2.0-py3-none-any.whl (6.6 kB)
Collecting sortedcontainers<3.0,>=2.0
  Downloading sortedcontainers-2.4.0-py2.py3-none-any.whl (29 kB)
Requirement already satisfied: wcwidth in /usr/lib/python3/dist-packages (from prettytable<3.0,>=2.0->pyocd<=0.31.0,>=0.28.3->spsdk<1.8.0,>=1.7.0->pynitrokey) (0.2.5)
Building wheels for collected packages: nrfutil, crcmod, sly, tlv8, commentjson, hexdump, pyspinel, fire, intervaltree, lark-parser, naturalsort, future
  Building wheel for nrfutil (setup.py) ... done
  Created wheel for nrfutil: filename=nrfutil-6.1.7-py3-none-any.whl size=898520 sha256=de6f8803f51d6c26d24dc7df6292064a468ff3f389d73370433fde5582b84a10
  Stored in directory: /home/jas/.cache/pip/wheels/39/2b/9b/98ab2dd716da746290e6728bdb557b14c1c9a54cb9ed86e13b
  Building wheel for crcmod (setup.py) ... done
  Created wheel for crcmod: filename=crcmod-1.7-cp310-cp310-linux_x86_64.whl size=31422 sha256=5149ac56fcbfa0606760eef5220fcedc66be560adf68cf38c604af3ad0e4a8b0
  Stored in directory: /home/jas/.cache/pip/wheels/85/4c/07/72215c529bd59d67e3dac29711d7aba1b692f543c808ba9e86
  Building wheel for sly (setup.py) ... done
  Created wheel for sly: filename=sly-0.4-py3-none-any.whl size=27352 sha256=f614e413918de45c73d1e9a8dca61ca07dc760d9740553400efc234c891f7fde
  Stored in directory: /home/jas/.cache/pip/wheels/a2/23/4a/6a84282a0d2c29f003012dc565b3126e427972e8b8157ea51f
  Building wheel for tlv8 (setup.py) ... done
  Created wheel for tlv8: filename=tlv8-0.10.0-py3-none-any.whl size=11266 sha256=3ec8b3c45977a3addbc66b7b99e1d81b146607c3a269502b9b5651900a0e2d08
  Stored in directory: /home/jas/.cache/pip/wheels/e9/35/86/66a473cc2abb0c7f21ed39c30a3b2219b16bd2cdb4b33cfc2c
  Building wheel for commentjson (setup.py) ... done
  Created wheel for commentjson: filename=commentjson-0.9.0-py3-none-any.whl size=12092 sha256=28b6413132d6d7798a18cf8c76885dc69f676ea763ffcb08775a3c2c43444f4a
  Stored in directory: /home/jas/.cache/pip/wheels/7d/90/23/6358a234ca5b4ec0866d447079b97fedf9883387d1d7d074e5
  Building wheel for hexdump (setup.py) ... done
  Created wheel for hexdump: filename=hexdump-3.3-py3-none-any.whl size=8913 sha256=79dfadd42edbc9acaeac1987464f2df4053784fff18b96408c1309b74fd09f50
  Stored in directory: /home/jas/.cache/pip/wheels/26/28/f7/f47d7ecd9ae44c4457e72c8bb617ef18ab332ee2b2a1047e87
  Building wheel for pyspinel (setup.py) ... done
  Created wheel for pyspinel: filename=pyspinel-1.0.3-py3-none-any.whl size=65033 sha256=01dc27f81f28b4830a0cf2336dc737ef309a1287fcf33f57a8a4c5bed3b5f0a6
  Stored in directory: /home/jas/.cache/pip/wheels/95/ec/4b/6e3e2ee18e7292d26a65659f75d07411a6e69158bb05507590
  Building wheel for fire (setup.py) ... done
  Created wheel for fire: filename=fire-0.5.0-py2.py3-none-any.whl size=116951 sha256=3d288585478c91a6914629eb739ea789828eb2d0267febc7c5390cb24ba153e8
  Stored in directory: /home/jas/.cache/pip/wheels/90/d4/f7/9404e5db0116bd4d43e5666eaa3e70ab53723e1e3ea40c9a95
  Building wheel for intervaltree (setup.py) ... done
  Created wheel for intervaltree: filename=intervaltree-3.1.0-py2.py3-none-any.whl size=26119 sha256=5ff1def22ba883af25c90d90ef7c6518496fcd47dd2cbc53a57ec04cd60dc21d
  Stored in directory: /home/jas/.cache/pip/wheels/fa/80/8c/43488a924a046b733b64de3fac99252674c892a4c3801c0a61
  Building wheel for lark-parser (setup.py) ... done
  Created wheel for lark-parser: filename=lark_parser-0.7.8-py2.py3-none-any.whl size=62527 sha256=3d2ec1d0f926fc2688d40777f7ef93c9986f874169132b1af590b6afc038f4be
  Stored in directory: /home/jas/.cache/pip/wheels/29/30/94/33e8b58318aa05cb1842b365843036e0280af5983abb966b83
  Building wheel for naturalsort (setup.py) ... done
  Created wheel for naturalsort: filename=naturalsort-1.5.1-py3-none-any.whl size=7526 sha256=bdecac4a49f2416924548cae6c124c85d5333e9e61c563232678ed182969d453
  Stored in directory: /home/jas/.cache/pip/wheels/a6/8e/c9/98cfa614fff2979b457fa2d9ad45ec85fa417e7e3e2e43be51
  Building wheel for future (setup.py) ... done
  Created wheel for future: filename=future-0.18.3-py3-none-any.whl size=492037 sha256=57a01e68feca2b5563f5f624141267f399082d2f05f55886f71b5d6e6cf2b02c
  Stored in directory: /home/jas/.cache/pip/wheels/5e/a9/47/f118e66afd12240e4662752cc22cefae5d97275623aa8ef57d
Successfully built nrfutil crcmod sly tlv8 commentjson hexdump pyspinel fire intervaltree lark-parser naturalsort future
Installing collected packages: tlv8, sortedcontainers, sly, pyserial, pyelftools, piccata, naturalsort, libusb1, lark-parser, intelhex, hexdump, fastjsonschema, crcmod, asn1crypto, wrapt, urllib3, typing_extensions, tqdm, termcolor, ruamel.yaml.clib, python-dateutil, pyspinel, pypemicro, pycryptodome, psutil, protobuf, prettytable, oscrypto, milksnake, libusbsio, jinja2, intervaltree, humanfriendly, future, frozendict, fido2, ecdsa, deepmerge, commentjson, click-option-group, click-command-tree, capstone, astunparse, argparse-addons, ruamel.yaml, pyocd-pemicro, pylink-square, pc_ble_driver_py, fire, cmsis-pack-manager, bincopy, pyocd, nrfutil, nkdfu, spsdk, pynitrokey
  WARNING: The script nitropy is installed in '/home/jas/.local/bin' which is not on PATH.
  Consider adding this directory to PATH or, if you prefer to suppress this warning, use --no-warn-script-location.
Successfully installed argparse-addons-0.12.0 asn1crypto-1.5.1 astunparse-1.6.3 bincopy-17.10.3 capstone-4.0.2 click-command-tree-1.1.0 click-option-group-0.5.5 cmsis-pack-manager-0.2.10 commentjson-0.9.0 crcmod-1.7 deepmerge-0.3.0 ecdsa-0.18.0 fastjsonschema-2.16.3 fido2-1.1.0 fire-0.5.0 frozendict-2.3.5 future-0.18.3 hexdump-3.3 humanfriendly-10.0 intelhex-2.3.0 intervaltree-3.1.0 jinja2-3.0.3 lark-parser-0.7.8 libusb1-1.9.3 libusbsio-2.1.11 milksnake-0.1.5 naturalsort-1.5.1 nkdfu-0.2 nrfutil-6.1.7 oscrypto-1.3.0 pc_ble_driver_py-0.17.0 piccata-2.0.3 prettytable-2.5.0 protobuf-3.20.3 psutil-5.9.4 pycryptodome-3.17 pyelftools-0.29 pylink-square-0.11.1 pynitrokey-0.4.34 pyocd-0.31.0 pyocd-pemicro-1.1.5 pypemicro-0.1.11 pyserial-3.5 pyspinel-1.0.3 python-dateutil-2.7.5 ruamel.yaml-0.17.21 ruamel.yaml.clib-0.2.7 sly-0.4 sortedcontainers-2.4.0 spsdk-1.7.1 termcolor-2.2.0 tlv8-0.10.0 tqdm-4.65.0 typing_extensions-4.3.0 urllib3-1.26.15 wrapt-1.15.0
jas@kaka:~$
Then upgrading the device worked remarkable well, although I wish that the tool would have printed URLs and checksums for the firmware files to allow easy confirmation.
jas@kaka:~$ PATH=$PATH:/home/jas/.local/bin
jas@kaka:~$ nitropy start list
Command line tool to interact with Nitrokey devices 0.4.34
:: 'Nitrokey Start' keys:
FSIJ-1.2.15-5D271572: Nitrokey Nitrokey Start (RTM.12.1-RC2-modified)
jas@kaka:~$ nitropy start update
Command line tool to interact with Nitrokey devices 0.4.34
Nitrokey Start firmware update tool
Platform: Linux-5.15.0-67-generic-x86_64-with-glibc2.35
System: Linux, is_linux: True
Python: 3.10.6
Saving run log to: /tmp/nitropy.log.gc5753a8
Admin PIN:
Firmware data to be used:
- FirmwareType.REGNUAL: 4408, hash: ...b'72a30389' valid (from ...built/RTM.13/regnual.bin)
- FirmwareType.GNUK: 129024, hash: ...b'25a4289b' valid (from ...prebuilt/RTM.13/gnuk.bin)
Currently connected device strings:
Device:
    Vendor: Nitrokey
   Product: Nitrokey Start
    Serial: FSIJ-1.2.15-5D271572
  Revision: RTM.12.1-RC2-modified
    Config: *:*:8e82
       Sys: 3.0
     Board: NITROKEY-START-G
initial device strings: [ 'name': '', 'Vendor': 'Nitrokey', 'Product': 'Nitrokey Start', 'Serial': 'FSIJ-1.2.15-5D271572', 'Revision': 'RTM.12.1-RC2-modified', 'Config': '*:*:8e82', 'Sys': '3.0', 'Board': 'NITROKEY-START-G' ]
Please note:
- Latest firmware available is:
  RTM.13 (published: 2022-12-08T10:59:11Z)
- provided firmware: None
- all data will be removed from the device!
- do not interrupt update process - the device may not run properly!
- the process should not take more than 1 minute
Do you want to continue? [yes/no]: yes
...
Starting bootloader upload procedure
Device: Nitrokey Start FSIJ-1.2.15-5D271572
Connected to the device
Running update!
Do NOT remove the device from the USB slot, until further notice
Downloading flash upgrade program...
Executing flash upgrade...
Waiting for device to appear:
  Wait 20 seconds.....
Downloading the program
Protecting device
Finish flashing
Resetting device
Update procedure finished. Device could be removed from USB slot.
Currently connected device strings (after upgrade):
Device:
    Vendor: Nitrokey
   Product: Nitrokey Start
    Serial: FSIJ-1.2.19-5D271572
  Revision: RTM.13
    Config: *:*:8e82
       Sys: 3.0
     Board: NITROKEY-START-G
device can now be safely removed from the USB slot
final device strings: [ 'name': '', 'Vendor': 'Nitrokey', 'Product': 'Nitrokey Start', 'Serial': 'FSIJ-1.2.19-5D271572', 'Revision': 'RTM.13', 'Config': '*:*:8e82', 'Sys': '3.0', 'Board': 'NITROKEY-START-G' ]
finishing session 2023-03-16 21:49:07.371291
Log saved to: /tmp/nitropy.log.gc5753a8
jas@kaka:~$
jas@kaka:~$ nitropy start list
Command line tool to interact with Nitrokey devices 0.4.34
:: 'Nitrokey Start' keys:
FSIJ-1.2.19-5D271572: Nitrokey Nitrokey Start (RTM.13)
jas@kaka:~$
Before importing the master key to this device, it should be configured. Note the commands in the beginning to make sure scdaemon/pcscd is not running because they may have cached state from earlier cards. Change PIN code as you like after this, my experience with Gnuk was that the Admin PIN had to be changed first, then you import the key, and then you change the PIN.
jas@kaka:~$ gpg-connect-agent "SCD KILLSCD" "SCD BYE" /bye
OK
ERR 67125247 Slut p  fil <GPG Agent>
jas@kaka:~$ ps auxww grep -e pcsc -e scd
jas        11651  0.0  0.0   3468  1672 pts/0    R+   21:54   0:00 grep --color=auto -e pcsc -e scd
jas@kaka:~$ gpg --card-edit
Reader ...........: 20A0:4211:FSIJ-1.2.19-5D271572:0
Application ID ...: D276000124010200FFFE5D2715720000
Application type .: OpenPGP
Version ..........: 2.0
Manufacturer .....: unmanaged S/N range
Serial number ....: 5D271572
Name of cardholder: [not set]
Language prefs ...: [not set]
Salutation .......:
URL of public key : [not set]
Login data .......: [not set]
Signature PIN ....: forced
Key attributes ...: rsa2048 rsa2048 rsa2048
Max. PIN lengths .: 127 127 127
PIN retry counter : 3 3 3
Signature counter : 0
KDF setting ......: off
Signature key ....: [none]
Encryption key....: [none]
Authentication key: [none]
General key info..: [none]
gpg/card> admin
Admin commands are allowed
gpg/card> kdf-setup
gpg/card> passwd
gpg: OpenPGP card no. D276000124010200FFFE5D2715720000 detected
1 - change PIN
2 - unblock PIN
3 - change Admin PIN
4 - set the Reset Code
Q - quit
Your selection? 3
PIN changed.
1 - change PIN
2 - unblock PIN
3 - change Admin PIN
4 - set the Reset Code
Q - quit
Your selection? q
gpg/card> name
Cardholder's surname: Josefsson
Cardholder's given name: Simon
gpg/card> lang
Language preferences: sv
gpg/card> sex
Salutation (M = Mr., F = Ms., or space): m
gpg/card> login
Login data (account name): jas
gpg/card> url
URL to retrieve public key: https://josefsson.org/key-20190320.txt
gpg/card> forcesig
gpg/card> key-attr
Changing card key attribute for: Signature key
Please select what kind of key you want:
   (1) RSA
   (2) ECC
Your selection? 2
Please select which elliptic curve you want:
   (1) Curve 25519
   (4) NIST P-384
Your selection? 1
The card will now be re-configured to generate a key of type: ed25519
Note: There is no guarantee that the card supports the requested size.
      If the key generation does not succeed, please check the
      documentation of your card to see what sizes are allowed.
Changing card key attribute for: Encryption key
Please select what kind of key you want:
   (1) RSA
   (2) ECC
Your selection? 2
Please select which elliptic curve you want:
   (1) Curve 25519
   (4) NIST P-384
Your selection? 1
The card will now be re-configured to generate a key of type: cv25519
Changing card key attribute for: Authentication key
Please select what kind of key you want:
   (1) RSA
   (2) ECC
Your selection? 2
Please select which elliptic curve you want:
   (1) Curve 25519
   (4) NIST P-384
Your selection? 1
The card will now be re-configured to generate a key of type: ed25519
gpg/card>
jas@kaka:~$ gpg --card-edit
Reader ...........: 20A0:4211:FSIJ-1.2.19-5D271572:0
Application ID ...: D276000124010200FFFE5D2715720000
Application type .: OpenPGP
Version ..........: 2.0
Manufacturer .....: unmanaged S/N range
Serial number ....: 5D271572
Name of cardholder: Simon Josefsson
Language prefs ...: sv
Salutation .......: Mr.
URL of public key : https://josefsson.org/key-20190320.txt
Login data .......: jas
Signature PIN ....: not forced
Key attributes ...: ed25519 cv25519 ed25519
Max. PIN lengths .: 127 127 127
PIN retry counter : 3 3 3
Signature counter : 0
KDF setting ......: on
Signature key ....: [none]
Encryption key....: [none]
Authentication key: [none]
General key info..: [none]
jas@kaka:~$
Once setup, bring out your offline machine and boot it and mount your USB stick with the offline key. The paths below will be different, and this is using a somewhat unorthodox approach of working with fresh GnuPG configuration paths that I chose for the USB stick.
jas@kaka:/media/jas/2c699cbd-b77e-4434-a0d6-0c4965864296$ cp -a gnupghome-backup-masterkey gnupghome-import-nitrokey-5D271572
jas@kaka:/media/jas/2c699cbd-b77e-4434-a0d6-0c4965864296$ gpg --homedir $PWD/gnupghome-import-nitrokey-5D271572 --edit-key B1D2BD1375BECB784CF4F8C4D73CF638C53C06BE
gpg (GnuPG) 2.2.27; Copyright (C) 2021 Free Software Foundation, Inc.
This is free software: you are free to change and redistribute it.
There is NO WARRANTY, to the extent permitted by law.
Secret key is available.
sec  ed25519/D73CF638C53C06BE
     created: 2019-03-20  expired: 2019-10-22  usage: SC
     trust: ultimate      validity: expired
[ expired] (1). Simon Josefsson <simon@josefsson.org>
gpg> keytocard
Really move the primary key? (y/N) y
Please select where to store the key:
   (1) Signature key
   (3) Authentication key
Your selection? 1
sec  ed25519/D73CF638C53C06BE
     created: 2019-03-20  expired: 2019-10-22  usage: SC
     trust: ultimate      validity: expired
[ expired] (1). Simon Josefsson <simon@josefsson.org>
gpg>
Save changes? (y/N) y
jas@kaka:/media/jas/2c699cbd-b77e-4434-a0d6-0c4965864296$
At this point it is useful to confirm that the Nitrokey has the master key available and that is possible to sign statements with it, back on your regular machine:
jas@kaka:~$ gpg --card-status
Reader ...........: 20A0:4211:FSIJ-1.2.19-5D271572:0
Application ID ...: D276000124010200FFFE5D2715720000
Application type .: OpenPGP
Version ..........: 2.0
Manufacturer .....: unmanaged S/N range
Serial number ....: 5D271572
Name of cardholder: Simon Josefsson
Language prefs ...: sv
Salutation .......: Mr.
URL of public key : https://josefsson.org/key-20190320.txt
Login data .......: jas
Signature PIN ....: not forced
Key attributes ...: ed25519 cv25519 ed25519
Max. PIN lengths .: 127 127 127
PIN retry counter : 3 3 3
Signature counter : 1
KDF setting ......: on
Signature key ....: B1D2 BD13 75BE CB78 4CF4  F8C4 D73C F638 C53C 06BE
      created ....: 2019-03-20 23:37:24
Encryption key....: [none]
Authentication key: [none]
General key info..: pub  ed25519/D73CF638C53C06BE 2019-03-20 Simon Josefsson <simon@josefsson.org>
sec>  ed25519/D73CF638C53C06BE  created: 2019-03-20  expires: 2023-09-19
                                card-no: FFFE 5D271572
ssb>  ed25519/80260EE8A9B92B2B  created: 2019-03-20  expires: 2023-09-19
                                card-no: FFFE 42315277
ssb>  ed25519/51722B08FE4745A2  created: 2019-03-20  expires: 2023-09-19
                                card-no: FFFE 42315277
ssb>  cv25519/02923D7EE76EBD60  created: 2019-03-20  expires: 2023-09-19
                                card-no: FFFE 42315277
jas@kaka:~$ echo foo gpg -a --sign gpg --verify
gpg: Signature made Thu Mar 16 22:11:02 2023 CET
gpg:                using EDDSA key B1D2BD1375BECB784CF4F8C4D73CF638C53C06BE
gpg: Good signature from "Simon Josefsson <simon@josefsson.org>" [ultimate]
jas@kaka:~$
Finally to retrieve and sign a key, for example Andre Heinecke s that I could confirm the OpenPGP key identifier from his business card.
jas@kaka:~$ gpg --locate-external-keys aheinecke@gnupg.com
gpg: key 1FDF723CF462B6B1: public key "Andre Heinecke <aheinecke@gnupg.com>" imported
gpg: Total number processed: 1
gpg:               imported: 1
gpg: marginals needed: 3  completes needed: 1  trust model: pgp
gpg: depth: 0  valid:   2  signed:   7  trust: 0-, 0q, 0n, 0m, 0f, 2u
gpg: depth: 1  valid:   7  signed:  64  trust: 7-, 0q, 0n, 0m, 0f, 0u
gpg: next trustdb check due at 2023-05-26
pub   rsa3072 2015-12-08 [SC] [expires: 2025-12-05]
      94A5C9A03C2FE5CA3B095D8E1FDF723CF462B6B1
uid           [ unknown] Andre Heinecke <aheinecke@gnupg.com>
sub   ed25519 2017-02-13 [S]
sub   ed25519 2017-02-13 [A]
sub   rsa3072 2015-12-08 [E] [expires: 2025-12-05]
sub   rsa3072 2015-12-08 [A] [expires: 2025-12-05]
jas@kaka:~$ gpg --edit-key "94A5C9A03C2FE5CA3B095D8E1FDF723CF462B6B1"
gpg (GnuPG) 2.2.27; Copyright (C) 2021 Free Software Foundation, Inc.
This is free software: you are free to change and redistribute it.
There is NO WARRANTY, to the extent permitted by law.
pub  rsa3072/1FDF723CF462B6B1
     created: 2015-12-08  expires: 2025-12-05  usage: SC
     trust: unknown       validity: unknown
sub  ed25519/2978E9D40CBABA5C
     created: 2017-02-13  expires: never       usage: S
sub  ed25519/DC74D901C8E2DD47
     created: 2017-02-13  expires: never       usage: A
The following key was revoked on 2017-02-23 by RSA key 1FDF723CF462B6B1 Andre Heinecke <aheinecke@gnupg.com>
sub  cv25519/1FFE3151683260AB
     created: 2017-02-13  revoked: 2017-02-23  usage: E
sub  rsa3072/8CC999BDAA45C71F
     created: 2015-12-08  expires: 2025-12-05  usage: E
sub  rsa3072/6304A4B539CE444A
     created: 2015-12-08  expires: 2025-12-05  usage: A
[ unknown] (1). Andre Heinecke <aheinecke@gnupg.com>
gpg> sign
pub  rsa3072/1FDF723CF462B6B1
     created: 2015-12-08  expires: 2025-12-05  usage: SC
     trust: unknown       validity: unknown
 Primary key fingerprint: 94A5 C9A0 3C2F E5CA 3B09  5D8E 1FDF 723C F462 B6B1
     Andre Heinecke <aheinecke@gnupg.com>
This key is due to expire on 2025-12-05.
Are you sure that you want to sign this key with your
key "Simon Josefsson <simon@josefsson.org>" (D73CF638C53C06BE)
Really sign? (y/N) y
gpg> quit
Save changes? (y/N) y
jas@kaka:~$
This is on my day-to-day machine, using the NitroKey Start with the offline key. No need to boot the old offline machine just to sign keys or extend expiry anymore! At FOSDEM 23 I managed to get at least one DD signature on my new key, and the Debian keyring maintainers accepted my Ed25519 key. Hopefully I can now finally let my 2014-era RSA3744 key expire in 2023-09-19 and not extend it any further. This should finish my transition to a simpler OpenPGP key setup, yay!
Github accidentally committed their SSH RSA private key to a repository, and now a bunch of people's infrastructure is broken because it needs to be updated to trust the new key. This is obviously bad, but what's frustrating is that there's no inherent need for it to be - almost all the technological components needed to both reduce the initial risk and to make the transition seamless already exist.
But first, let's talk about what actually happened here. You're probably used to the idea of TLS certificates from using browsers. Every website that supports TLS has an asymmetric pair of keys divided into a public key and a private key. When you contact the website, it gives you a certificate that contains the public key, and your browser then performs a series of cryptographic operations against it to (a) verify that the remote site possesses the private key (which prevents someone just copying the certificate to another system and pretending to be the legitimate site), and (b) generate an ephemeral encryption key that's used to actually encrypt the traffic between your browser and the site. But what stops an attacker from simply giving you a fake certificate that contains their public key? The certificate is itself signed by a certificate authority (CA), and your browser is configured to trust a preconfigured set of CAs. CAs will not give someone a signed certificate unless they prove they have legitimate ownership of the site in question, so (in theory) an attacker will never be able to obtain a fake certificate for a legitimate site.
This infrastructure is used for pretty much every protocol that can use TLS, including things like SMTP and IMAP. But SSH doesn't use TLS, and doesn't participate in any of this infrastructure. Instead, SSH tends to take a "Trust on First Use" (TOFU) model - the first time you ssh into a server, you receive a prompt asking you whether you trust its public key, and then you probably hit the "Yes" button and get on with your life. This works fine up until the point where the key changes, and SSH suddenly starts complaining that there's a mismatch and something awful could be happening (like someone intercepting your traffic and directing it to their own server with their own keys). Users are then supposed to verify whether this change is legitimate, and if so remove the old keys and add the new ones. This is tedious and risks users just saying "Yes" again, and if it happens too often an attacker can simply redirect target users to their own server and through sheer fatigue at dealing with this crap the user will probably trust the malicious server.
Why not certificates? OpenSSH actually does support certificates, but not in the way you might expect. There's a custom format that's significantly less complicated than the X509 certificate format used in TLS. Basically, an SSH certificate just contains a public key, a list of hostnames it's good for, and a signature from a CA. There's no pre-existing set of trusted CAs, so anyone could generate a certificate that claims it's valid for, say, github.com. This isn't really a problem, though, because right now nothing pays attention to SSH host certificates unless there's some manual configuration.
(It's actually possible to glue the general PKI infrastructure into SSH certificates. Please do not do this)
So let's look at what happened in the Github case. The first question is "How could the private key have been somewhere that could be committed to a repository in the first place?". I have no unique insight into what happened at Github, so this is conjecture, but I'm reasonably confident in it. Github deals with a large number of transactions per second. Github.com is not a single computer - it's a large number of machines. All of those need to have access to the same private key, because otherwise git would complain that the private key had changed whenever it connected to a machine with a different private key (the alternative would be to use a different IP address for every frontend server, but that would instead force users to repeatedly accept additional keys every time they connect to a new IP address). Something needs to be responsible for deploying that private key to new systems as they're brought up, which means there's ample opportunity for it to accidentally end up in the wrong place.
Now, best practices suggest that this should be avoided by simply placing the private key in a hardware module that performs the cryptographic operations, ensuring that nobody can ever get at the private key. The problem faced here is that HSMs typically aren't going to be fast enough to handle the number of requests per second that Github deals with. This can be avoided by using something like a Nitro Enclave, but you're still going to need a bunch of these in different geographic locales because otherwise your front ends are still going to be limited by the need to talk to an enclave on the other side of the planet, and now you're still having to deal with distributing the private key to a bunch of systems.
What if we could have the best of both worlds - the performance of private keys that just happily live on the servers, and the security of private keys that live in HSMs? Unsurprisingly, we can! The SSH private key could be deployed to every front end server, but every minute it could call out to an HSM-backed service and request a new SSH host certificate signed by a private key in the HSM. If clients are configured to trust the key that's signing the certificates, then it doesn't matter what the private key on the servers is - the client will see that there's a valid certificate and will trust the key, even if it changes. Restricting the validity of the certificate to a small window of time means that if a key is compromised an attacker can't do much with it - the moment you become aware of that you stop signing new certificates, and once all the existing ones expire the old private key becomes useless. You roll out a new private key with new certificates signed by the same CA and clients just carry on trusting it without any manual involvement.
Why don't we have this already? The main problem is that client tooling just doesn't handle this well. OpenSSH has no way to do TOFU for CAs, just the keys themselves. This means there's no way to do a git clone ssh://git@github.com/whatever and get a prompt asking you to trust Github's CA. Instead, you need to add a @cert-authority github.com (key) line to your known_hosts file by hand, and since approximately nobody's going to do that there's only marginal benefit in going to the effort to implement this infrastructure. The most important thing we can do to improve the security of the SSH ecosystem is to make it easier to use certificates, and that means improving the behaviour of the clients.
It should be noted that certificates aren't the only approach to handling key migration. OpenSSH supports a protocol for key rotation, basically by allowing the server to provide a set of multiple trusted keys that the client can cache, and then invalidating old ones. Unfortunately this still requires that the "new" private keys be deployed in the same way as the old ones, so any screwup that results in one private key being leaked may well also result in the additional keys being leaked. I prefer the certificate approach.
Finally, I've seen a couple of people imply that the blame here should be attached to whoever or whatever caused the private key to be committed to a repository in the first place. This is a terrible take. Humans will make mistakes, and your systems should be resilient against that. There's no individual at fault here - there's a series of design decisions that made it possible for a bad outcome to occur, and in a better universe they wouldn't have been necessary. Let's work on building that better universe.
I would suggest that this blog post would be slightly unpleasant and I do wish that there was a way, a standardized way just like movies where you can put General, 14+, 16+, Adult and whatnot. so people could share without getting into trouble. I would suggest to consider this blog as for somewhat mature and perhaps disturbing.
Cutting off body parts
From last couple of months or so we have been getting daily reports of either men or women killed and then being chopped into pieces and this is being normalized . During my growing up years, the only such case I remember was the 1995 Tandoor case and it jolted the conscience of the nation. But it seems lot of water has passe under the bridge. as no one seems to be shocked anymore Also shocking are the number of heart attacks that young people are getting. Dunno the reason for either. Just saw this yesterday, The first thing to my mind was, at least she wasn t chopped. It was only latter I realized that the younger sister may have wanted to educate herself or have some other drreams, but because of some evil customs had to give hand in marriage. No outrage here for anything, not even child marriage :(. How have we become so insensitive. And it s mostly Hindus killing Hindus but still no outrage. We have been killing Muslims and Christians so that I guess is just par for the course :(. I wish I could say there is a solution but there seems to be not Even Child abuse cases have been going up but sad to say even they are being normalised. It s only when a US agency or somebody who feels shocked, then we feel shocked otherwise we have become numb
AMD and Lenovo Lappies
About couple of months ago I had made a blog post about lappies. Then Russel reached out to me on Twitter and we engaged. One thing lead to other and soon I saw on some other topic somewhere came across this
The above is a video presentation given by Mark Pearson. Sad to say it was not illuminating enough. Especially the whole boothole thing. I did see threeblogposts to get some more insight. The security entry did also share some news. I also reached out to Mr. Pearson to know both the status and also to enquire if there are any new lappies without an OS that I can buy from Lenovo. Sadly, both these e-mails went unanswered. Maybe they went to spam or something else, have no clue. While other organizations did work on it, Debian was kinda side-lined. Hence the annoyance from the Debian Maintainers that the whole thing came from the left field. And this doesn t just effect Debian but all those downstream distributions that rely on Debian . Now while it s almost a year since then and probably all has been fixed but there haven t been any instructions that I could find that tellls me if there is any new way or just the old way works. In any case, I do think bookworm release probably would have all the fixes needed. IIRC, we just entered soft freeze just couple of weeks back.
I have to admit something though, I have never used secure-boot as it has been designed, partially because I always run testing, irrespective of whatever device I use. And AFAIK the whole idea of Secure Boot is to have few updates unlike Testing which is kinda a rolling release thing. While Secure Boot wants same bits, all underlying bits, in Testing it s hard to ensure that as the idea is to test new releases of software and see what works and what breaks till we send it to final release (something like Bookworm ). FWIW, currently bookworm and Testing is one and the same till Bookworm releases, and then Testing would have its own updates from the next hour/day after.
This is the second part of how I build a read-only root setup for my router. You might want to read part 1 first, which covers the initial boot and general overview of how I tie the pieces together. This post will describe how I build the squashfs image that forms the main filesystem.
Most of the build is driven from a script, make-router, which I ll dissect below. It s highly tailored to my needs, and this is a fairly lengthy post, but hopefully the steps I describe prove useful to anyone trying to do something similar.
Breakdown of make-router
#!/bin/bash# Either rb3011 (arm) or rb5009 (arm64)#HOSTNAME="rb3011"HOSTNAME="rb5009"if["x$ HOSTNAME"=="xrb3011"];then
ARCH=armhf
elif["x$ HOSTNAME"=="xrb5009"];then
ARCH=arm64
else
echo"Unknown host: $ HOSTNAME"exit 1
fi
It s a bash script, and I allow building for either my RB3011 or RB5009, which means a different architecture (32 vs 64 bit). I run this script on my Pi 4 which means I don t have to mess about with QemuUserEmulation.
BASE_DIR=$(dirname$0)IMAGE_FILE=$(mktemp--tmpdir router.$ ARCH.XXXXXXXXXX.img)MOUNT_POINT=$(mktemp-p /mnt -d router.$ ARCH.XXXXXXXXXX)# Build and mount an ext4 image file to put the root file system indd if=/dev/zero bs=1 count=0 seek=1G of=$ IMAGE_FILE
mkfs -t ext4 $ IMAGE_FILE
mount -o loop $ IMAGE_FILE$ MOUNT_POINT
I build the image in a loopback ext4 file on tmpfs (my Pi4 is the 8G model), which makes things a bit faster.
# Add dpkg excludesmkdir-p$ MOUNT_POINT/etc/dpkg/dpkg.cfg.d/
cat<<EOF > $ MOUNT_POINT/etc/dpkg/dpkg.cfg.d/path-excludes
# Exclude docs
path-exclude=/usr/share/doc/*
# Only locale we want is English
path-exclude=/usr/share/locale/*
path-include=/usr/share/locale/en*/*
path-include=/usr/share/locale/locale.alias
# No man pages
path-exclude=/usr/share/man/*
EOF
Create a dpkg excludes config to drop docs, man pages and most locales before we even start the bootstrap.
Actually do the debootstrap step, including a bunch of extra packages that we want.
# Install mqtt-arpcp$ BASE_DIR/debs/mqtt-arp_1_$ ARCH.deb $ MOUNT_POINT/tmp
chroot$ MOUNT_POINT dpkg -i /tmp/mqtt-arp_1_$ ARCH.deb
rm$ MOUNT_POINT/tmp/mqtt-arp_1_$ ARCH.deb
# Frob the mqtt-arp config so it starts after mosquittosed-i-e's/After=.*/After=mosquitto.service/'$ MOUNT_POINT/lib/systemd/system/mqtt-arp.service
I haven t uploaded mqtt-arp to Debian, so I install a locally built package, and ensure it starts after mosquitto (the MQTT broker), given they re running on the same host.
# Frob watchdog so it starts earlier than multi-usersed-i-e's/After=.*/After=basic.target/'$ MOUNT_POINT/lib/systemd/system/watchdog.service
# Make sure the watchdog is poking the device filesed-i-e's/^#watchdog-device/watchdog-device/'$ MOUNT_POINT/etc/watchdog.conf
watchdog timeouts were particularly an issue on the RB3011, where the default timeout didn t give enough time to reach multiuser mode before it would reset the router. Not helpful, so alter the config to start it earlier (and make sure it s configured to actually kick the device file).
# Clean up docs + localesrm-r$ MOUNT_POINT/usr/share/doc/*rm-r$ MOUNT_POINT/usr/share/man/*for dir in$ MOUNT_POINT/usr/share/locale/*/;do
if["$ dir"!="$ MOUNT_POINT/usr/share/locale/en/"];then
rm-r$ dirfi
done
Clean up any docs etc that ended up installed.
# Set root password to rootecho"root:root"chroot$ MOUNT_POINT chpasswd
The only login method is ssh key to the root account though I suppose this allows for someone to execute a privilege escalation from a daemon user so I should probably randomise this. Does need to be known though so it s possible to login via the serial console for debugging.
There are config files that are easier to replace wholesale, some of which are specific to the hardware (e.g. related to network interfaces). See below for some more details.
# Build symlinks into flash for boot / modulesln-s /mnt/flash/lib/modules $ MOUNT_POINT/lib/modules
rmdir$ MOUNT_POINT/boot
ln-s /mnt/flash/boot $ MOUNT_POINT/boot
The kernel + its modules live outside the squashfs image, on the USB flash drive that the image lives on. That makes for easier kernel upgrades.
# Put our git revision into os-releaseecho-n"GIT_VERSION=">>$ MOUNT_POINT/etc/os-release
(cd$ BASE_DIR; git describe --tags)>>$ MOUNT_POINT/etc/os-release
Always helpful to be able to check the image itself for what it was built from.
# Add some stuff to root's .bashrccat<<EOF >> $ MOUNT_POINT/root/.bashrc
alias ls='ls -F --color=auto'
eval "\$(dircolors)"
case "\$TERM" in
xterm* rxvt*)
PS1="\\[\\e]0;\\u@\\h: \\w\a\\]\$PS1"
;;
*)
;;
esac
EOF
Just some niceties for when I do end up logging in.
# Save the installed package list offchroot$ MOUNT_POINT dpkg --get-selections> /tmp/wip-installed-packages
Save off the installed package list. This was particularly useful when trying to replicate the existing router setup and making sure I had all the important packages installed. It doesn t really serve a purpose now.
In terms of the config files I copy into /etc, shared across both routers are the following:
Breakdown of shared config
In one week from now, Twitter will block free API access. This prevents anyone who has written interesting bot accounts, integrations, or tooling from accessing Twitter without paying for it. A whole number of fascinating accounts will cease functioning, people will no longer be able to use tools that interact with Twitter, and anyone using a free service to do things like find Twitter mutuals who have moved to Mastodon or to cross-post between Twitter and other services will be blocked.
There's a cynical interpretation to this, which is that despite firing 75% of the workforce Twitter is still not profitable and Elon is desperate to not have Twitter go bust and also not to have to tank even more of his Tesla stock to achieve that. But let's go with the less cynical interpretation, which is that API access to Twitter is something that enables bot accounts that make things worse for everyone. Except, well, why would a hostile bot account do that?
To interact with an API you generally need to present some sort of authentication token to the API to prove that you're allowed to access it. It's easy enough to restrict issuance of those tokens to people who pay for the service. But, uh, how do the apps work? They need to be able to communicate with the service to tell it to post tweets, retrieve them, and so on. And the simple answer to that is that they use some hardcoded authentication tokens. And while registering for an API token yourself identifies that you're not using an official client, using the tokens embedded in the clients makes it look like you are. If you want to make it look like you're a human, you're already using tokens ripped out of the official clients.
The Twitter client API keys are widely known. Anyone who's pretending to be a human is using those already and will be unaffected by the shutdown of the free API tier. Services like movetodon.org do get blocked. This isn't an anti-abuse choice. It's one that makes it harder to move to other services. It's one that blocks a bunch of the integrations and accounts that bring value to the platform. It's one that hurts people who follow the rules, without hurting the ones who don't. This isn't an anti-abuse choice, it's about trying to consolidate control of the platform.
After my previous efforts, I wrote up a PKCS#11 module of my own that had no odd restrictions about using non-RSA keys and I tested it. And things looked much better - ssh successfully obtained the key, negotiated with the server to determine that it was present in authorized_keys, and then went to actually do the key verification step. At which point things went wrong - the Sign() method in my PKCS#11 module was never called, and a strange debug1: identity_sign: sshkey_sign: error in libcrypto sign_and_send_pubkey: signing failed for ECDSA "testkey": error in libcrypto" error appeared in the ssh output. Odd. libcrypto was originally part of OpenSSL, but Apple ship the LibreSSL fork. Apple don't include the LibreSSL source in their public source repo, but do include OpenSSH. I grabbed the OpenSSH source and jumped through a whole bunch of hoops to make it build (it uses the macosx.internal SDK, which isn't publicly available, so I had to cobble together a bunch of headers from various places), and also installed upstream LibreSSL with a version number matching what Apple shipped. And everything worked - I logged into the server using a hardware-backed key.
Was the difference in OpenSSH or in LibreSSL? Telling my OpenSSH to use the system libcrypto resulted in the same failure, so it seemed pretty clear this was an issue with the Apple version of the library. The way all this works is that when OpenSSH has a challenge to sign, it calls ECDSA_do_sign(). This then calls ECDSA_do_sign_ex(), which in turn follows a function pointer to the actual signature method. By default this is a software implementation that expects to have the private key available, but you can also register your own callback that will be used instead. The OpenSSH PKCS#11 code does this by calling EC_KEY_set_method(), and as a result calling ECDSA_do_sign() ends up calling back into the PKCS#11 code that then calls into the module that communicates with the hardware and everything works.
Except it doesn't under macOS. Running under a debugger and setting a breakpoint on EC_do_sign(), I saw that we went down a code path with a function called ECDSA_do_sign_new(). This doesn't appear in any of the public source code, so seems to be an Apple-specific patch. I pushed Apple's libcrypto into Ghidra and looked at ECDSA_do_sign() and found something that approximates this:
nid = EC_GROUP_get_curve_name(curve);
if (nid == NID_X9_62_prime256v1)
  return ECDSA_do_sign_new(dgst,dgst_len,eckey);

return ECDSA_do_sign_ex(dgst,dgst_len,NULL,NULL,eckey);
What this means is that if you ask ECDSA_do_sign() to sign something on a Mac, and if the key in question corresponds to the NIST P256 elliptic curve type, it goes down the ECDSA_do_sign_new() path and never calls the registered callback. This is the only key type supported by the Apple Secure Enclave, so I assume it's special-cased to do something with that. Unfortunately the consequence is that it's impossible to use a PKCS#11 module that uses Secure Enclave keys with the shipped version of OpenSSH under macOS. For now I'm working around this with an SSH agent built using Go's agent module, forwarding most requests through to the default session agent but appending hardware-backed keys and implementing signing with them, which is probably what I should have done in the first place.
Working in information security means building controls, developing technologies that ensure that sensitive material can only be accessed by people that you trust. It also means categorising people into "trustworthy" and "untrustworthy", and trying to come up with a reasonable way to apply that such that people can do their jobs without all your secrets being available to just anyone in the company who wants to sell them to a competitor. It means ensuring that accounts who you consider to be threats shouldn't be able to do any damage, because if someone compromises an internal account you need to be able to shut them down quickly.
And like pretty much any security control, this can be used for both good and bad. The technologies you develop to monitor users to identify compromised accounts can also be used to compromise legitimate users who management don't like. The infrastructure you build to push updates to users can also be used to push browser extensions that interfere with labour organisation efforts. In many cases there's no technical barrier between something you've developed to flag compromised accounts and the same technology being used to flag users who are unhappy with certain aspects of management.
If you're asked to build technology that lets you make this sort of decision, think about whether that's what you want to be doing. Think about who can compel you to use it in ways other than how it was intended. Consider whether that's something you want on your conscience. And then think about whether you can meet those requirements in a different way. If they can simply compel one junior engineer to alter configuration, that's very different to an implementation that requires sign-offs from multiple senior developers. Make sure that all such policy changes have to be clearly documented, including not just who signed off on it but who asked them to. Build infrastructure that creates a record of who decided to fuck over your coworkers, rather than just blaming whoever committed the config update. The blame trail should never terminate in the person who was told to do something or get fired - the blame trail should clearly indicate who ordered them to do that.
But most importantly: build security features as if they'll be used against you.
There's a bunch of ways you can store cryptographic keys. The most obvious is to just stick them on disk, but that has the downside that anyone with access to the system could just steal them and do whatever they wanted with them. At the far end of the scale you have Hardware Security Modules (HSMs), hardware devices that are specially designed to self destruct if you try to take them apart and extract the keys, and which will generate an audit trail of every key operation. In between you have things like smartcards, TPMs, Yubikeys, and other platform secure enclaves - devices that don't allow arbitrary access to keys, but which don't offer the same level of assurance as an actual HSM (and are, as a result, orders of magnitude cheaper).
The problem with all of these hardware approaches is that they have entirely different communication mechanisms. The industry realised this wasn't ideal, and in 1994 RSA released version 1 of the PKCS#11 specification. This defines a C interface with a single entry point - C_GetFunctionList. Applications call this and are given a structure containing function pointers, with each entry corresponding to a PKCS#11 function. The application can then simply call the appropriate function pointer to trigger the desired functionality, such as "Tell me how many keys you have" and "Sign this, please". This is both an example of C not just being a programming language and also of you having to shove a bunch of vendor-supplied code into your security critical tooling, but what could possibly go wrong.
(Linux distros work around this problem by using p11-kit, which is a daemon that speaks d-bus and loads PKCS#11 modules for you. You can either speak to it directly over d-bus, or for apps that only speak PKCS#11 you can load a module that just transports the PKCS#11 commands over d-bus. This moves the weird vendor C code out of process, and also means you can deal with these modules without having to speak the C ABI, so everyone wins)
One of my work tasks at the moment is helping secure SSH keys, ensuring that they're only issued to appropriate machines and can't be stolen afterwards. For Windows and Linux machines we can stick them in the TPM, but Macs don't have a TPM as such. Instead, there's the Secure Enclave - part of the T2 security chip on x86 Macs, and directly integrated into the M-series SoCs. It doesn't have anywhere near as many features as a TPM, let alone an HSM, but it can generate NIST curve elliptic curve keys and sign things with them and that's good enough. Things are made more complicated by Apple only allowing keys to be used by the app that generated them, so it's hard for applications to generate keys on behalf of each other. This can be mitigated by using CryptoTokenKit, an interface that allows apps to present tokens to the systemwide keychain. Although this is intended for allowing a generic interface for access to such tokens (kind of like PKCS#11), an app can generate its own keys in the Secure Enclave and then expose them to other apps via the keychain through CryptoTokenKit.
Of course, applications then need to know how to communicate with the keychain. Browsers mostly do so, and Apple's version of SSH can to an extent. Unfortunately, that extent is "Retrieve passwords to unlock on-disk keys", which doesn't help in our case. PKCS#11 comes to the rescue here! Apple ship a module called ssh-keychain.dylib, a PKCS#11 module that's intended to allow SSH to use keys that are present in the system keychain. Unfortunately it's not super well maintained - it got broken when Big Sur moved all the system libraries into a cache, but got fixed up a few releases later. Unfortunately every time I tested it with our CryptoTokenKit provider (and also when I retried with SecureEnclaveToken to make sure it wasn't just our code being broken), ssh would tell me "provider /usr/lib/ssh-keychain.dylib returned no slots" which is not especially helpful. Finally I realised that it was actually generating more debug output, but it was being sent to the system debug logs rather than the ssh debug output. Well, when I say "more debug output", I mean "Certificate []: algorithm is not supported, ignoring it", which still doesn't tell me all that much. So I stuck it in Ghidra and searched for that string, and the line above it was
with it immediately failing if the key isn't RSA. Which it isn't, since the Secure Enclave doesn't support RSA. Apple's PKCS#11 module appears incapable of making use of keys generated on Apple's hardware.
There's a couple of ways of dealing with this. The first, which is taken by projects like Secretive, is to implement the SSH agent protocol and have SSH delegate key management to that agent, which can then speak to the keychain. But if you want this to work in all cases you need to implement all the functionality in the existing ssh-agent, and that seems like a bunch of work. The second is to implement a PKCS#11 module, which sounds like less work but probably more mental anguish. I'll figure that out tomorrow.
Long-term Linux users may remember that Alan Cox used to write an online diary. This was before the concept of a "Weblog" had really become a thing, and there certainly weren't any expectations around what one was used for - while now blogging tends to imply a reasonably long-form piece on a specific topic, Alan was just sitting there noting small life concerns or particular technical details in interesting problems he'd solved that day. For me, that was fascinating. I was trying to figure out how to get into kernel development, and was trying to read as much LKML as I could to figure out how kernel developers did stuff. But when you see discussion on LKML, you're frequently missing the early stages. If an LKML patch is a picture of an owl, I wanted to know how to draw the owl, and most of the conversations about starting in kernel development were very "Draw two circles. Now draw the rest of the owl". Alan's musings gave me insight into the thought processes involved in getting from "Here's the bug" to "Here's the patch" in ways that really wouldn't have worked in a more long-form medium.
For the past decade or so, as I moved away from just doing kernel development and focused more on security work instead, Twitter's filled a similar role for me. I've seen people just dumping their thought process as they work through a problem, helping me come up with effective models for solving similar problems. I've learned that the smartest people in the field will spend hours (if not days) working on an issue before realising that they misread something back at the beginning and that's helped me feel like I'm not unusually bad at any of this. It's helped me learn more about my peers, about my field, and about myself.
Twitter's now under new ownership that appears to think all the worst bits of Twitter were actually the good bits, so I've mostly bailed to the Fediverse instead. There's no intrinsic length limit on posts there - Mastodon defaults to 500 characters per post, but that's configurable per instance. But even at 500 characters, it means there's more room to provide thoughtful context than there is on Twitter, and what I've seen so far is more detailed conversation and higher levels of meaningful engagement. Which is great! Except it also seems to discourage some of the posting style that I found so valuable on Twitter - if your timeline is full of nuanced discourse, it feels kind of rude to just scream "THIS FUCKING PIECE OF SHIT IGNORES THE HIGH ADDRESS BIT ON EVERY OTHER WRITE" even though that's exactly the sort of content I'm there for.
And, yeah, not everything has to be for me. But I worry that as Twitter's relevance fades for the people I'm most interested in, we're replacing it with something that's not equivalent - something that doesn't encourage just dropping 50 characters or so of your current thought process into a space where it can be seen by thousands of people. And I think that's a shame.
I've written about bearer tokens and how much pain they cause me before, but sadly wishing for a better world doesn't make it happen so I'm making do with what's available. Okta has a feature called Device Trust which allows to you configure access control policies that prevent people obtaining tokens unless they're using a trusted device. This doesn't actually bind the tokens to the hardware in any way, so if a device is compromised or if a user is untrustworthy this doesn't prevent the token ending up on an unmonitored system with no security policies. But it's an incremental improvement, other than the fact that for desktop it's only supported on Windows and MacOS, which really doesn't line up well with my interests.
Obviously there's nothing fundamentally magic about these platforms, so it seemed fairly likely that it would be possible to make this work elsewhere. I spent a while staring at the implementation using Charles Proxy and the Chrome developer tools network tab and had worked out a lot, and then Okta published a paper describing a lot of what I'd just laboriously figured out. But it did also help clear up some points of confusion and clarified some design choices. I'm not going to give a full description of the details (with luck there'll be code shared for that before too long), but here's an outline of how all of this works. Also, to be clear, I'm only going to talk about the desktop support here - mobile is a bunch of related but distinct things that I haven't looked at in detail yet.
Okta's Device Trust (as officially supported) relies on Okta Verify, a local agent. When initially installed, Verify authenticates as the user, obtains a token with a scope that allows it to manage devices, and then registers the user's computer as an additional MFA factor. This involves it generating a JWT that embeds a number of custom claims about the device and its state, including things like the serial number. This JWT is signed with a locally generated (and hardware-backed, using a TPM or Secure Enclave) key, which allows Okta to determine that any future updates from a device claiming the same identity are genuinely from the same device (you could construct an update with a spoofed serial number, but you can't copy the key out of a TPM so you can't sign it appropriately). This is sufficient to get a device registered with Okta, at which point it can be used with Fastpass, Okta's hardware-backed MFA mechanism.
As outlined in the aforementioned deep dive paper, Fastpass is implemented via multiple mechanisms. I'm going to focus on the loopback one, since it's the one that has the strongest security properties. In this mode, Verify listens on one of a list of 10 or so ports on localhost. When you hit the Okta signin widget, choosing Fastpass triggers the widget into hitting each of these ports in turn until it finds one that speaks Fastpass and then submits a challenge to it (along with the URL that's making the request). Verify then constructs a response that includes the challenge and signs it with the hardware-backed key, along with information about whether this was done automatically or whether it included forcing the user to prove their presence. Verify then submits this back to Okta, and if that checks out Okta completes the authentication.
Doing this via loopback from the browser has a bunch of nice properties, primarily around the browser providing information about which site triggered the request. This means the Verify agent can make a decision about whether to submit something there (ie, if a fake login widget requests your creds, the agent will ignore it), and also allows the issued token to be cross-checked against the site that requested it (eg, if g1thub.com requests a token that's valid for github.com, that's a red flag). It's not quite at the same level as a hardware WebAuthn token, but it has many of the anti-phishing properties.
But none of this actually validates the device identity! The entire registration process is up to the client, and clients are in a position to lie. Someone could simply reimplement Verify to lie about, say, a device serial number when registering, and there'd be no proof to the contrary. Thankfully there's another level to this to provide stronger assurances. Okta allows you to provide a CA root[1]. When Okta issues a Fastpass challenge to a device the challenge includes a list of the trusted CAs. If a client has a certificate that chains back to that, it can embed an additional JWT in the auth JWT, this one containing the certificate and signed with the certificate's private key. This binds the CA-issued identity to the Fastpass validation, and causes the device to start appearing as "Managed" in the Okta device management UI. At that point you can configure policy to restrict various apps to managed devices, ensuring that users are only able to get tokens if they're using a device you've previously issued a certificate to.
I've managed to get Linux tooling working with this, though there's still a few drawbacks. The main issue is that the API only allows you to register devices that declare themselves as Windows or MacOS, followed by the login system sniffing browser user agent and only offering Fastpass if you're on one of the officially supported platforms. This can be worked around with an extension that spoofs user agent specifically on the login page, but that's still going to result in devices being logged as a non-Linux OS which makes interpreting the logs more difficult. There's also no ability to choose which bits of device state you log: there's a couple of existing integrations, and otherwise a fixed set of parameters that are reported. It'd be lovely to be able to log arbitrary material and make policy decisions based on that.
This also doesn't help with ChromeOS. There's no real way to automatically launch something that's bound to localhost (you could probably make this work using Crostini but there's no way to launch a Crostini app at login), and access to hardware-backed keys is kind of a complicated topic in ChromeOS for privacy reasons. I haven't tried this yet, but I think using an enterprise force-installed extension and the chrome.enterprise.platformKeys API to obtain a device identity cert and then intercepting requests to the appropriate port range on localhost ought to be enough to do that? But I've literally never written any Javascript so I don't know. Okta supports falling back from the loopback protocol to calling a custom URI scheme, but once you allow that you're also losing a bunch of the phishing protection, so I'd prefer not to take that approach.
Like I said, none of this prevents exfiltration of bearer tokens once they've been issued, and there's still a lot of ecosystem work to do there. But ensuring that tokens can't be issued to unmanaged machines in the first place is still a step forwards, and with luck we'll be able to make use of this on Linux systems without relying on proprietary client-side tooling.
(Time taken to code this implementation: about two days, and under 1000 lines of new code. Time taken to figure out what the fuck to write: rather a lot longer)
[1] There's also support for having Okta issue certificates, but then you're kind of back to the "How do I know this is my device" situation
 I dug out a computer running Fedora 28, which was released 2018-04-01 - over 5 years ago. Backing up the data and re-installing seemed tedious, but the current version of Fedora is 38, and while Fedora supports updates from N to N+2 that was still going to be 5 separate upgrades. That seemed tedious, so I figured I'd just try to do an update from 28 directly to 38. This is, obviously, extremely unsupported, but what could possibly go wrong?
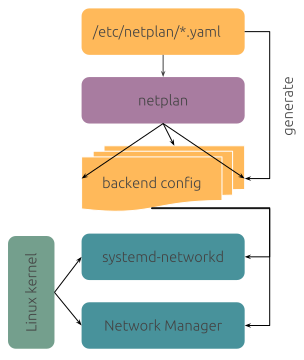
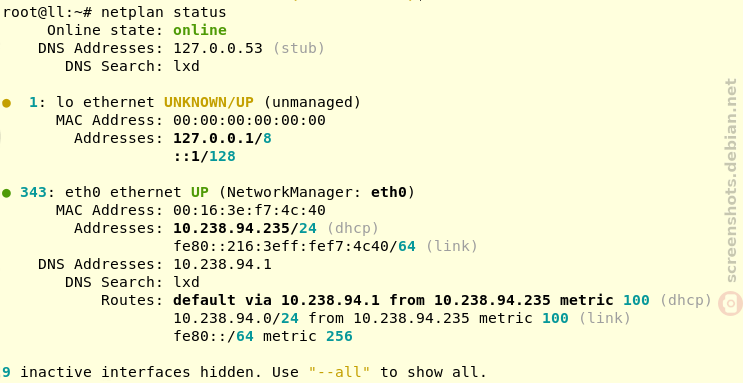
 Reduce the size of your c: partition to the smallest it can be and then turn off windows with the understanding that you will never boot this system on the iron ever again.
 To find the literal path names of your detected drives you can run fdisk -l. Pay attention to the names of the partitions and the sizes of the drives to help determine which is which.
Once you have a shell in the netinst installer, you should maybe be able to run a command like the following. This will duplicate the disk located at if (in file) to the disk located at of (out file) while showing progress as the status.
To find the literal path names of your detected drives you can run fdisk -l. Pay attention to the names of the partitions and the sizes of the drives to help determine which is which.
Once you have a shell in the netinst installer, you should maybe be able to run a command like the following. This will duplicate the disk located at if (in file) to the disk located at of (out file) while showing progress as the status.
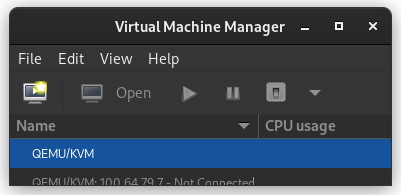 In the New VM window, select Import existing disk image
  When prompted for the path to the image, use the one we created with sudo qemu-img convert above.
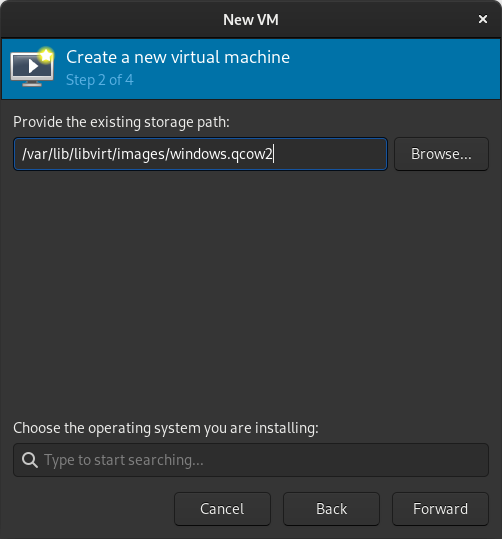 Select the version of Windows you want.
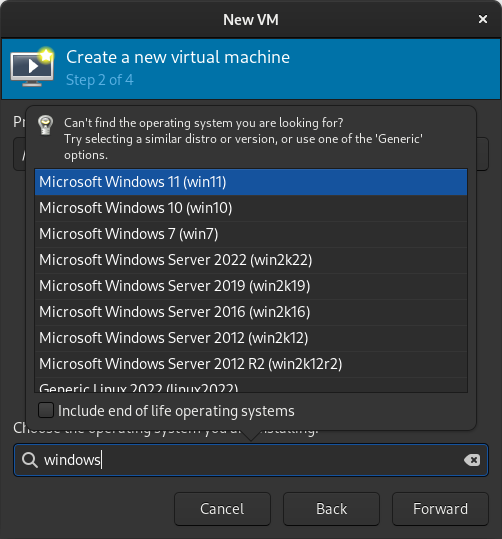 Select memory and CPUs to allocate to the VM.
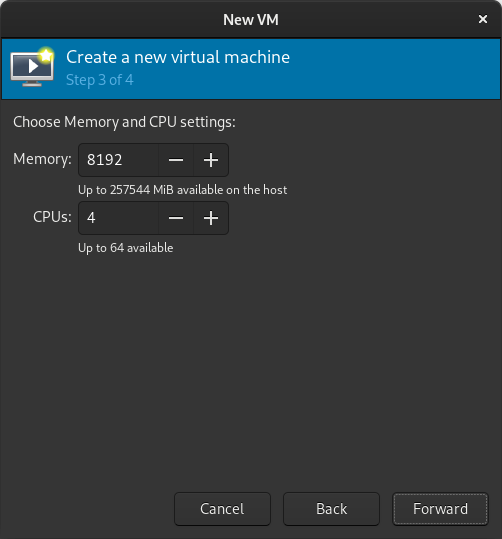 Tick the Customize configuration before install box
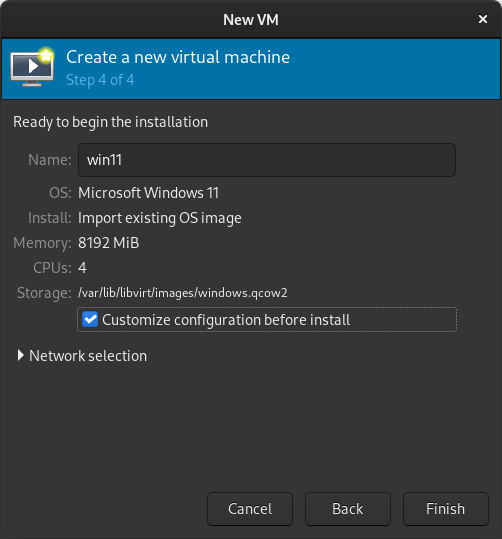 If you re prompted to enable the default network, do so now.
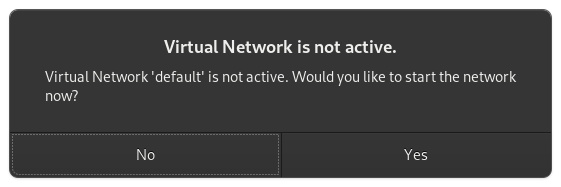 The default hardware layout should probably suffice. Get it as close to the underlying hardware as it is convenient to do. But Windows is pretty lenient these days about virtualizing licensed windows instances so long as they re not running in more than one place at a time.
 Good luck! Leave comments if you have questions.


 Did you follow the instructions linked above in the prerequisites section? If not, take a moment to do so now.
 You may be warned that Rufus will be acting as dd.
 Don t forget to select the USB drive that you want to write the image to. In my example, the device is creatively called NO_LABEL .
 You may be warned that re-imaging the USB disk will result in the previous data on the USB disk being lost.
 Once the process is complete, the application will indicate that it is complete.
 You should now have a USB disk with the Proxmox installer image on it. Place the USB disk into one of the blue, USB-3.0, USB-A slots on the Qotom device so that the system can read the installer image from it at full speed. The Proxmox installer requires a keyboard, video and mouse. Please attach these to the device along with inserting the USB disk you just created.
 Press the power button on the Qotom device. Press the F11 key repeatedly until you see the AMI BIOS menu. Press F11 a couple more times. You ll be presented with a boot menu. One of the options will launch the Proxmox installer. By trial and error, I found that the correct boot menu option was UEFI OS
 Once you select the correct option, you will be presented with a menu that looks like this. Select the default option and install.
 During the install, you will be presented with an option of the block device to install to. I think there s only a single block device in this celeron, but if there are more than one, I prefer the smaller one for the ProxMox OS. I also make a point to limit the size of the root filesystem to 16G. I think it will take up the entire volume group if you don t set a limit.
Okay, I ll do another install and select the correct filesystem.
During the install, you will be presented with an option of the block device to install to. I think there s only a single block device in this celeron, but if there are more than one, I prefer the smaller one for the ProxMox OS. I also make a point to limit the size of the root filesystem to 16G. I think it will take up the entire volume group if you don t set a limit.
Okay, I ll do another install and select the correct filesystem.
 If you read this far and want me to add some more screenshots and better instructions, leave a comment.
 Nitrokey Start
 I would suggest that this blog post would be slightly unpleasant and I do wish that there was a way, a standardized way just like movies where you can put General, 14+, 16+, Adult and whatnot. so people could share without getting into trouble. I would suggest to consider this blog as for somewhat mature and perhaps disturbing.
 Also shocking are the number of heart attacks that young people are getting. Dunno the reason for either. Just saw
  This is the second part of how I build a read-only root setup for my router. You might want to read